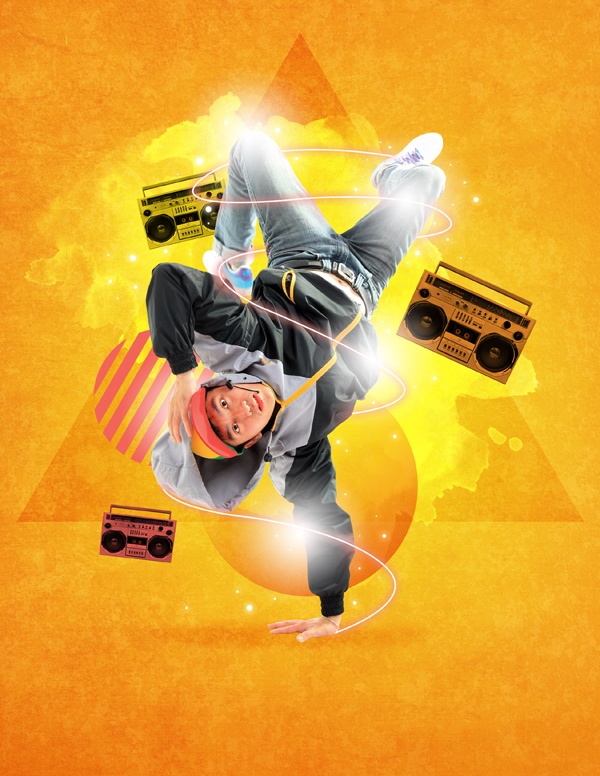
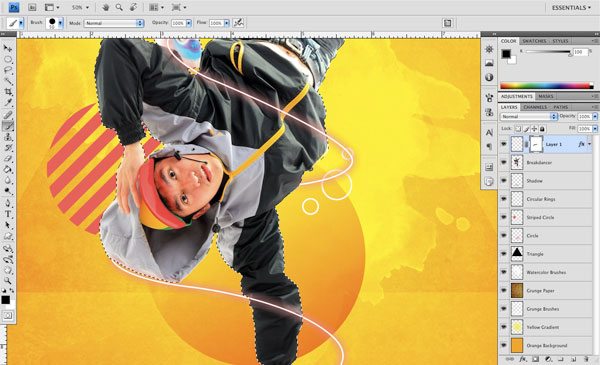
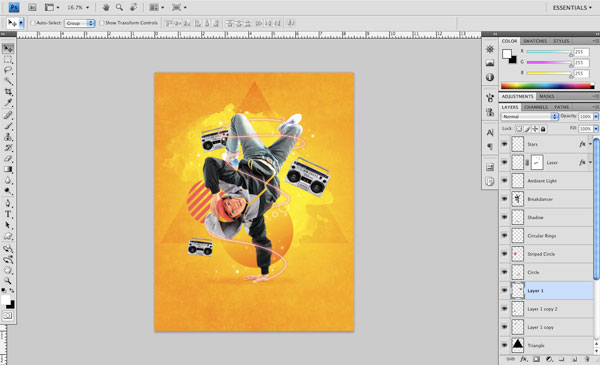
Click the image below to see its full size.
Tutorial Resources
- Stock Image: breakdancer – “hip hop breakdance” from Bigstock
- Stock Image: boom box – “1980’s Silver Radio Boom Box” from iStockphoto
- Brushes: BK Grunge Brushes from BrushKing
- Texture: Grunge Paper – “Paper- unrestricted” by jm-stock
- Brushes: Watercolor Brushes Vol 1 from WeGraphics
Step 1: Preparing the Breakdancer
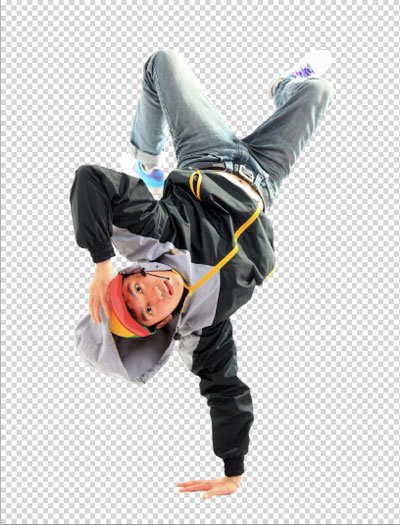
Once we’ve opened up Photoshop, we are going to download and open our breakdancer stock image (purchased from Bigstock).After opening the image in Photoshop, we want to remove the background so that we have the dancer isolated on a transparent background. Normally, a quick and easy way to do this would be using the Magic Wand Tool, but because some areas of the subject (such as the pants and shoes) fade into the white background, the Magic Wand Tool may not select our subject accurately.
Instead, I would recommend using either the Pen Tool (P) to trace around the subject or a layer mask where you can simply brush out the areas you want to get rid of. Masking is generally my preference because if I mess up, it’s very easy to brush back in the original image rather than erasing it and losing it for good.
Once you have removed the background, save the image (Cmd/Ctrl + S). We will be bringing it into a new Photoshop document shortly (after preparing our second stock image).
Take your time when making selections and isolating your images — the details are important.
Step 2: Preparing the Boom Box
Next, we want to download and open up the boom box (purchased through iStockphoto).Unlike our first image, the Magic Wand Tool may be an appropriate choice for removing the background. Once you activate the Magic Wand Tool (W), you will notice in the Options Bar that there is an option called Tolerance, which is set to 32 by default. In the image below, you will see what happens when we select the white background area of the boom box image with a Tolerance set to 32:

You will notice that with a higher Tolerance value, some of the selection is spilling over so that we are also selecting part of the boom box. We need to use a lower Tolerance value to have a more accurate selection. If you haven’t already deselected the selection, simply press Cmd/Ctrl + D.
Let’s change the Tolerance setting to 18 before selecting the white background again. This time, with a lower setting, we are only getting the background; this is exactly what we want.
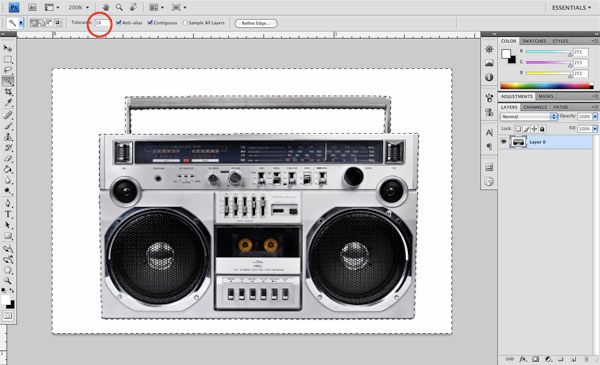
Just press Delete (or go to Edit > Clear) to get rid of this background. Afterwards, save the image.
Step 3: Create the Main Photoshop Document
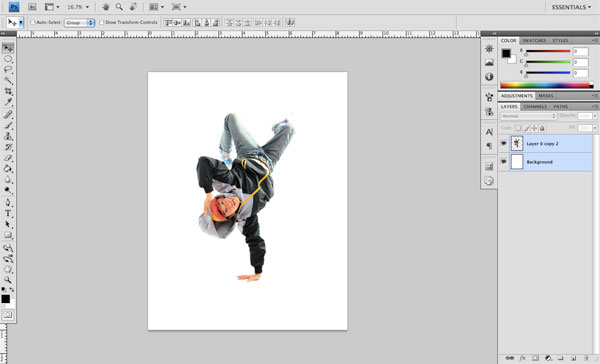
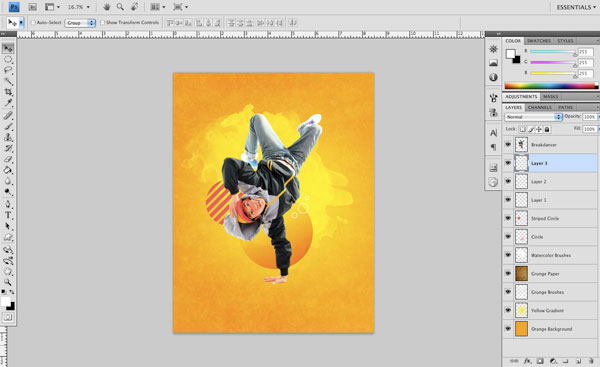
After isolating and saving the images of the breakdancer and the boom box, we are going to create our main Photoshop document. We will use an 8.5×11inch portrait for our canvas.Double-click the default Background layer to unlock it, and then place the image of the breakdancer on top of it.
We will need to scale up our breakdancer a bit, but luckily, we can get away with this without sacrificing any significant loss in quality and resolution. Use Free Transform (Cmd/Ctrl + T) while holding down Shift (to maintain proportions) to scale the image up (use the following image for reference).
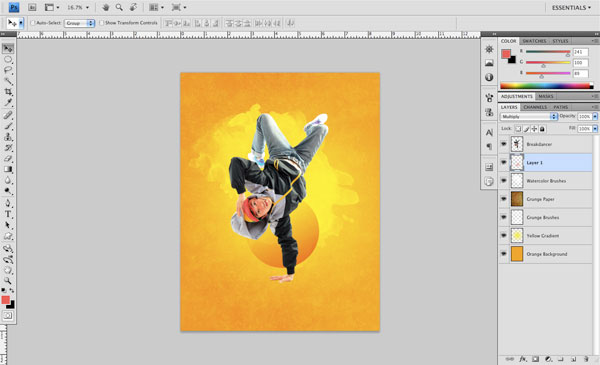
Step 4: Set the Background Colors
Grab the Paint Bucket Tool (G) and choose a bright orange color (#F2A62C) to fill the Background layer.Next, create a new layer just above the Background layer and then switch from the Paint Bucket Tool to the Gradient Tool. Change our Foreground Color to a shade of yellow (#F9F61C). Set the Gradient Tool to Radial Gradient and use the Foreground to Transparent gradient preset.
Click and drag outwards from the center of the image to create a yellow gradient that will fade into the orange color of the background.

Step 5: Creating the Background Texture
Download and load up the BK Grunge Brushes. (Alternatively, consider other free brushes in the Design Instruct Freebie section.)Change the Foreground Color to solid white (#FFFFFF). Switch to the Brush Tool (B). Select one of the larger brushes from the grunge brushes set and change the Master Diameter to 2500px.
Create a new layer underneath the breakdancer and paint onto the canvas. Use Free Transform (Cmd/Ctrl + T) to rotate the brush so that it is oriented vertically. You may also have to scale it up a bit just to cover the whole canvas.
Next, grab another large grunge brush (still using white), and set it to the maximum Master Diameter setting. Create another new layer above the previous layer to apply the paint stroke on. Also, adjust this paint stroke by rotating it and scaling it up so it also covers the entire canvas.
Once you are happy with the background texture, merge the two layers together by selecting both layers in the Layers Panel, right-clicking on them, and choosing Merge Layers (Cmd/Ctrl + E).
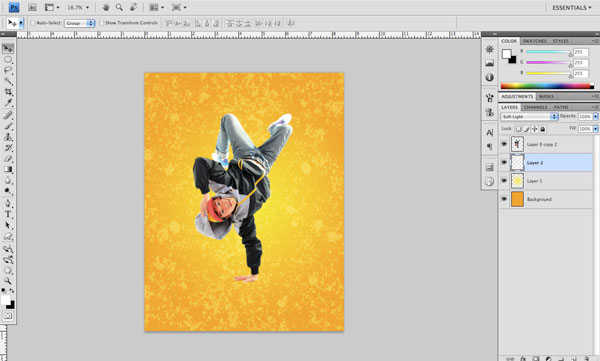
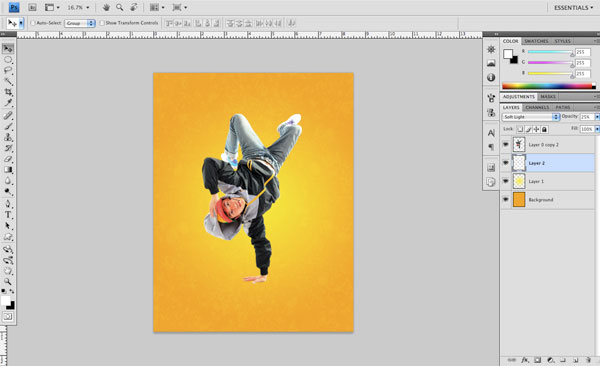
Change the Blend Mode of the merged layer to Soft Light and lower the Opacity to 25%.
Step 6: Bring On the Grunge
Download and place the Grunge Paper texture into the document. Use Free Transform (Cmd/Ctrl + T) while holding down Shift to rotate the image and orient it vertically. Still using Free Transform (and still needing to press down Shift), drag one of the transform controls in the corners to stretch the texture until it covers the entire canvas.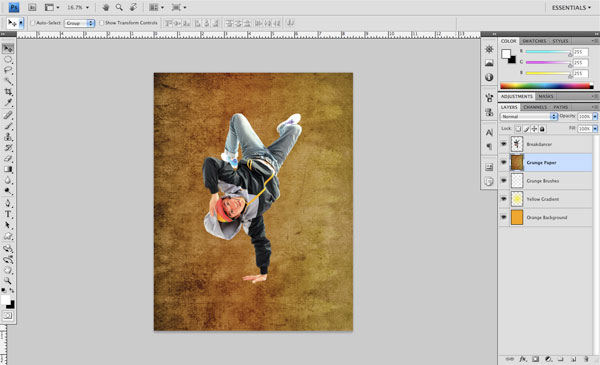
Change the Blend Mode of this layer to Overlay and reduce the layer Opacity to 50% for a more subtle effect. We are gradually building up a background using several textures with different blending modes rather than just using one single image or brush, all so that our background is a bit more interesting.
Step 7: Bring On the Watercolor Textures
Now what we want to do is create new layer on top of the grunge paper texture from the previous step. Download and load up the Watercolor Brushes Vol 1 by fellow Design Instruct contributor, Sebastiano Guerriero. If you don’t already have the brush color set to solid white (#FFFFFF), do so at this point. Set the size of this brush to 2500px and paint at the center of the image, behind the breakdancer.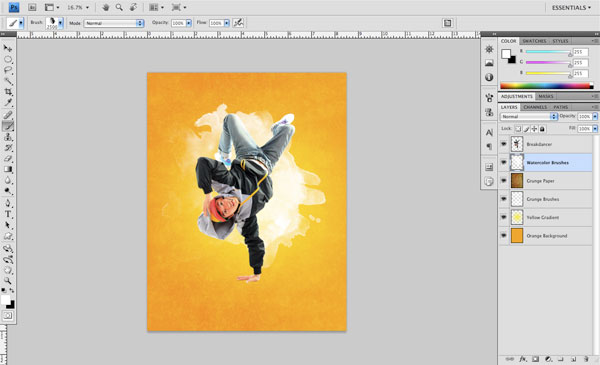
Right now, the brush is harshly unblended with its background. To fix that, just change the Blend Mode of the layer to Overlay.
We are going to repeat this method with the fifth watercolor brush from the set (2500px, white). On another new layer above the previous watercolor brush stroke, paint at the upper left of the breakdancer. You will see that with this particular brush, there is a long drip that extends downwards. I have used the Eraser Tool (E) with a soft brush at about 30% Opacity to gradually erase the drip.
Next, set the Blend Mode of the layer to Overlay and merge it with the layer below it by pressing Cmd/Ctrl + E.

Step 8: Picking Up Some Color
Now we want to start bringing in some additional colors. Some of the colors from the image of the breakdancer, perhaps. I’ve sampled a shade of magenta (#F16459) from the dancer’s hat using the Eyedropper Tool (I).With our Foreground Color chosen, create a new layer above the watercolor texture layer. Choose the Elliptical Marquee Tool (M) and, while holding Shift, create a medium-sized circle on this layer. While the selection is active, change to the Gradient Tool (G) and make sure it’s set to Linear Gradient and at the Foreground to Transparent gradient preset. Drag your cursor diagonally across the elliptical selection to create a linear gradient inside it. Change the Blend Mode of the layer to Multiply and then use the Move Tool (V) to locate the circle towards the lower part of the breakdancer.
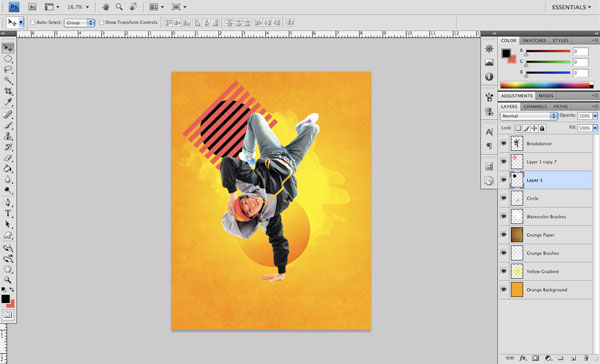
Step 9: Creating Diagonal Stripes Inside of a Shape
Next, we are going to add some diagonal stripes to give our design a nice, dynamic element. To start, create a new layer above the previous layer, just underneath the breakdancer. Switch to the Rectangular Marquee Tool (M) and draw a vertical rectangle (as shown below). Fill the selection with the same magenta color (#F16459) we used in the previous step using the Paint Bucket Tool (G).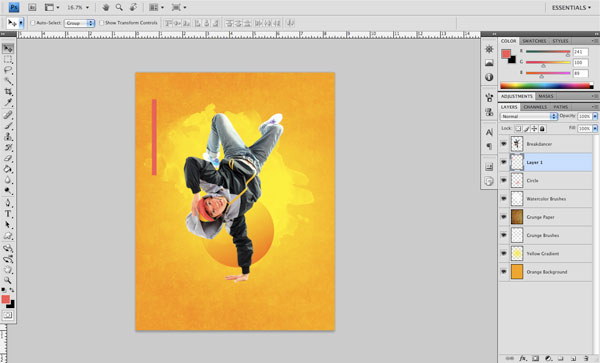
Duplicate (Cmd/Ctrl + J) the vertical rectangle stripe 6 times. Use the Move Tool (V) and your Shift + Arrow keys to move the duplicates to the right; ensure that they have equal spacing between them.
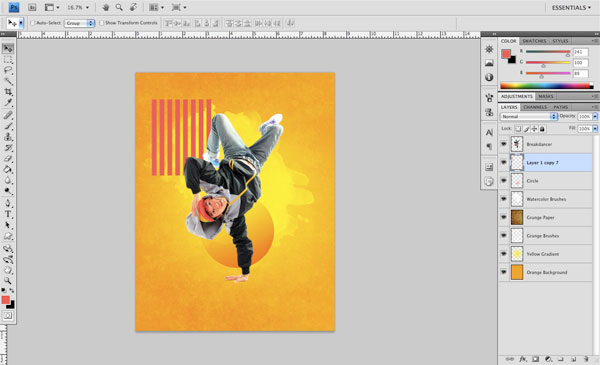
Then merge all the layers into one layer by selecting them in the Layers Panel and then pressing Cmd/Ctrl + E.
Use Free Transform (Cmd/Ctrl + T) while holding Shift to rotate the stripes diagonally 45o.
Create a new layer just below the diagonal stripes and switch to the Elliptical Marquee Tool (M). Hold down Shift and drag out a circle shape that spans the width of the diagonal stripes. Fill the shape with black (#000000).
Hold down Cmd/Ctrl and then click on the layer containing the black circle to create a selection around it. Keep the selection active, switch to the diagonal stripes layer, and then create a layer mask using the selection by clicking on the Add layer mask button at the bottom of the Layers Panel.
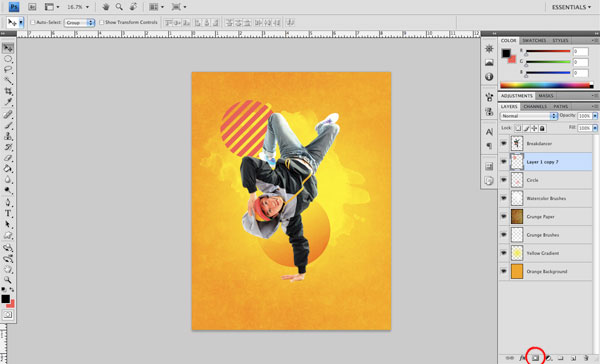
You can now delete the circle layer because it is no longer needed.
Reduce the size of the diagonal stripes using Free Transform. Move the diagonal stripes so that it is placed next to the breakdancer’s head.

Step 10: Creating Rings
We will continue to add some additional geometric shapes to the scene by again using the Elliptical Marquee Tool (M). On a new layer, create a small circular selection and fill it with white.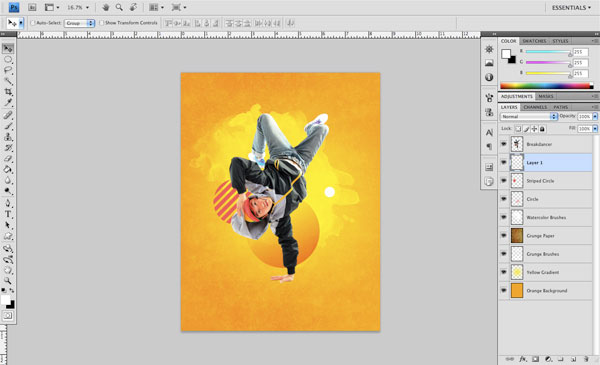
Next, while the selection is still active, go to Select > Modify > Contract and contract your selection by 6px.
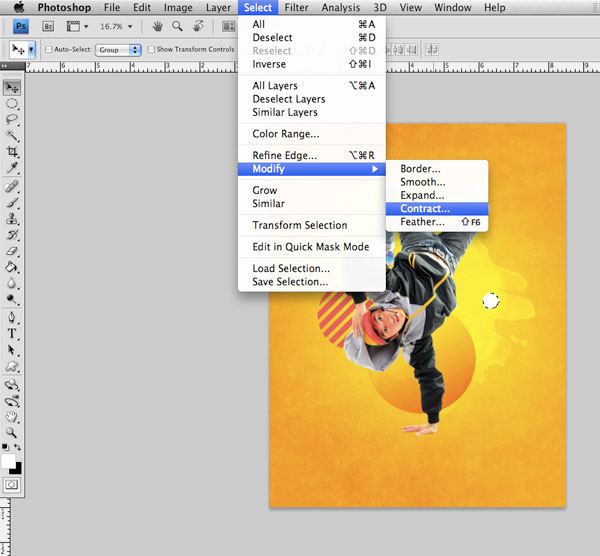
Go to Edit > Clear to delete the area inside the contracted selection, and you will be left with a circular ring.

Create two more rings using the same method as above and position them as shown below (they look sort of like bubbles).
Select all three rings in the Layers Panel and merge them into one layer (Cmd/Ctrl + E).
Step 11: Three Sides Is Better than None
Create a new layer above the watercolor brush texture layer. Select black (#000000) for your Foreground Color. Next, select the Custom Shape Tool (U) from the Tools Panel. On the Options Bar, at the Shape dropdown menu, find the custom shape called Triangle. Hold Shift to maintain proportions and draw a triangle on the canvas.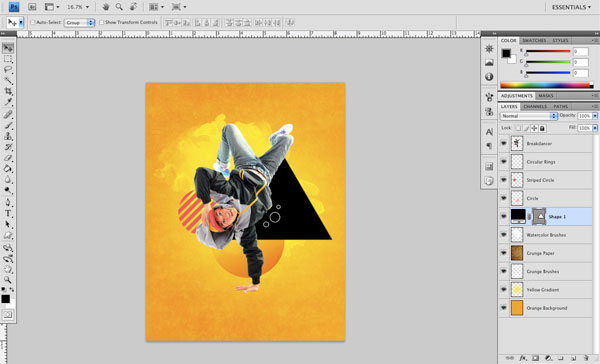
Rasterize the shape layer by right-clicking on the layer and choosing Rasterize from the menu. Scale up the shape as needed using Free Transform.
Change the Blend Mode of the black triangle layer to Overlay and position it at the center of the scene.

Step 12: Adding a Shadow
Next, we are going to add a shadow underneath the breakdancer. Create a new layer below the breakdancer and select the Elliptical Marquee Tool (M). Set the Feather option of the tool to about 16px. Create a short and wide ellipse right under the hand of the breakdancer and fill it with black. The shape will look blurry because of the feather, but that is what we want.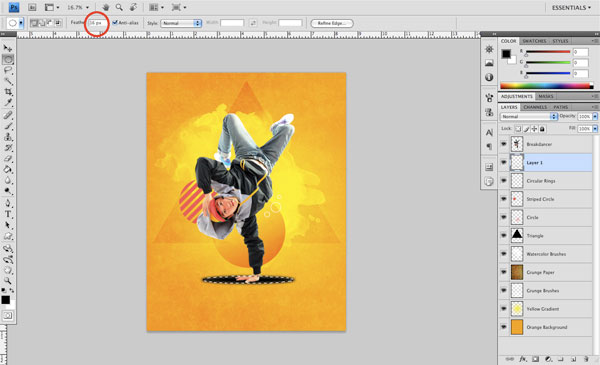
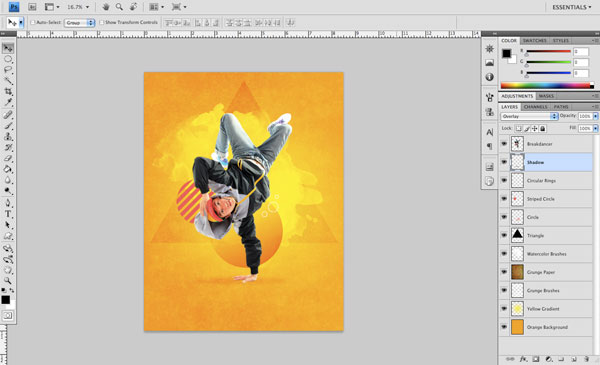
Now, change the Blend Mode of this layer to Overlay and move it over slightly to the left. Use the Eraser Tool (E) with a soft, round eraser at 30% Opacity to erase just the left and right sides of the ellipse, making one or two passes so that the edges taper off.
Step 13: Creating a Light Streak
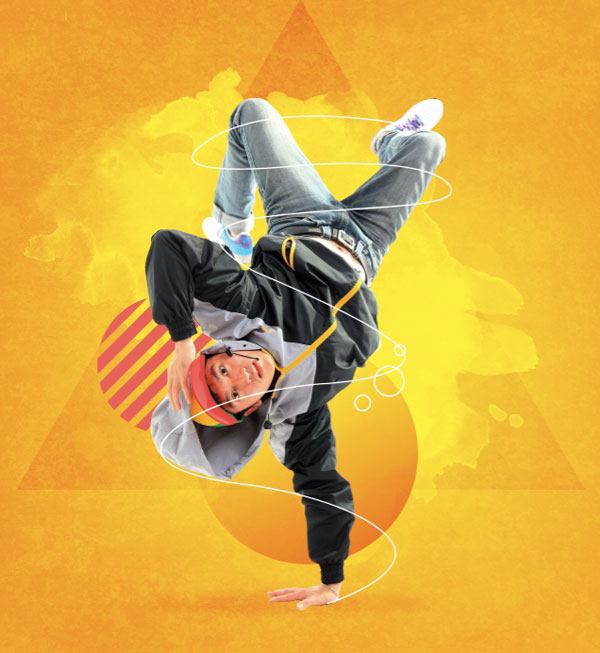
Create a new layer on top of all the layers thus far. Choose the Pen Tool (P) with the Paths option selected (instead of Shape layers, which is the default). Starting at the hand of the breakdancer, create a windy path that curves up and around different parts of the subject.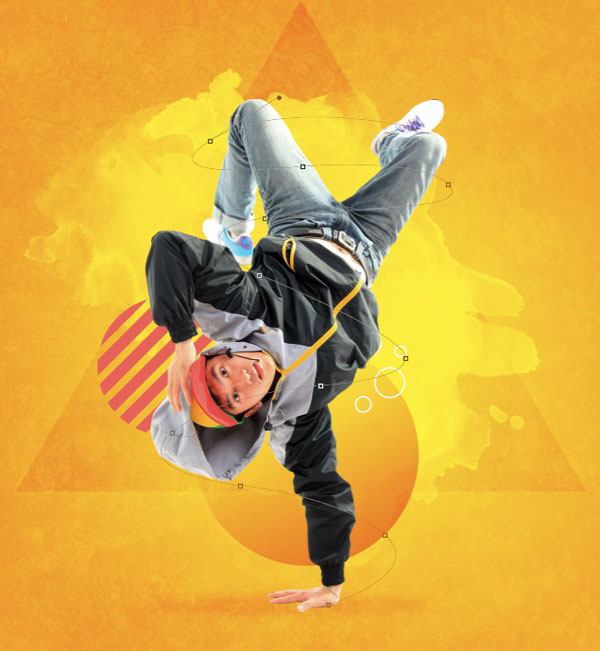
Now switch to the Brush Tool (B) and set it to a 5px, hard round white brush. What we are going to do from here is switch back to the Pen Tool, right-click on any part of the path and then choose Stroke Path from the menu that appears. Once you do this, you’ll see the Stroke Path dialog window. Find Brush from the dropdown menu (by default, Stroke Path is set to Pencil) and leave the Simulate Pressure option unchecked.
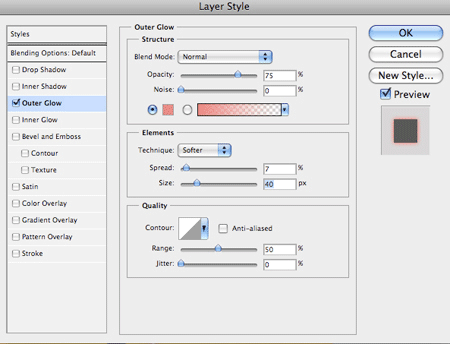
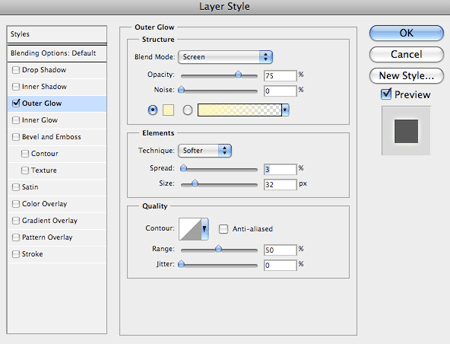
Double-click on the path’s layer to bring up the Layer Style dialog window. Apply an Outer Glow layer effect (recommended settings shown below, Outer Glow color is #F58D86).
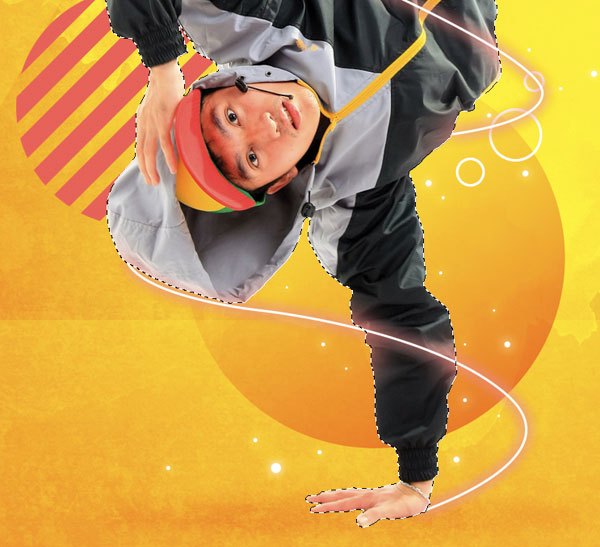
Step 14: Make the Light Streak Wrap around the Breakdancer
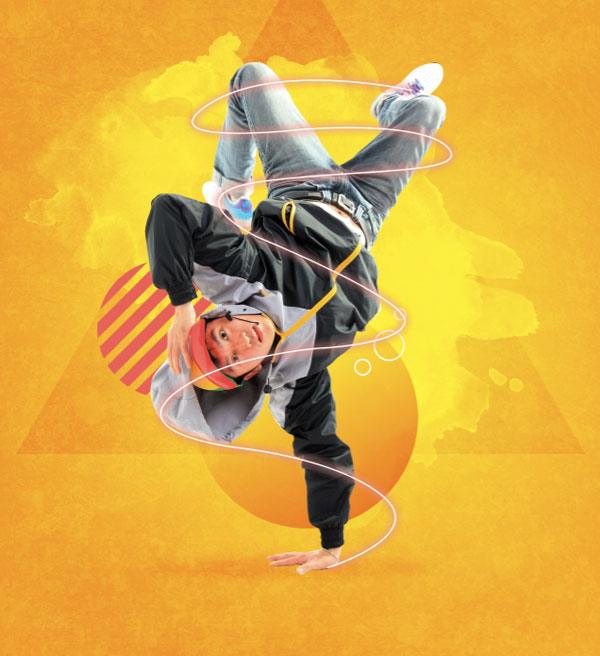
Now that we have our path set up with an outer glow effect, we are going to make it appear as though it is wrapping around the subject. On the light streak layer, create a layer mask by clicking on the Add layer mask button at the bottom of the Layers Panel.Set the Brush Tool (B) to a 50px, hard round black brush. On the layer mask, paint on wherever we need to hide the light streak. Zoom in close for this because you want to make this masking process as accurate as possible.
Tip: Here is a suggestion that will make this process even easier for you. While you are on the path layer and working on the layer mask, Cmd/Ctrl + click on the subject’s layer to make a selection around the breakdancer; this way, as we paint on the layer mask, we are only erasing parts of the path that are within this selection.
Step 15: Bring Out the Stars
On a new layer, use a hard round white brush to place a few dots of varying sizes around the subject. Don’t go too large with these guys and try to space them out to make them look organically placed.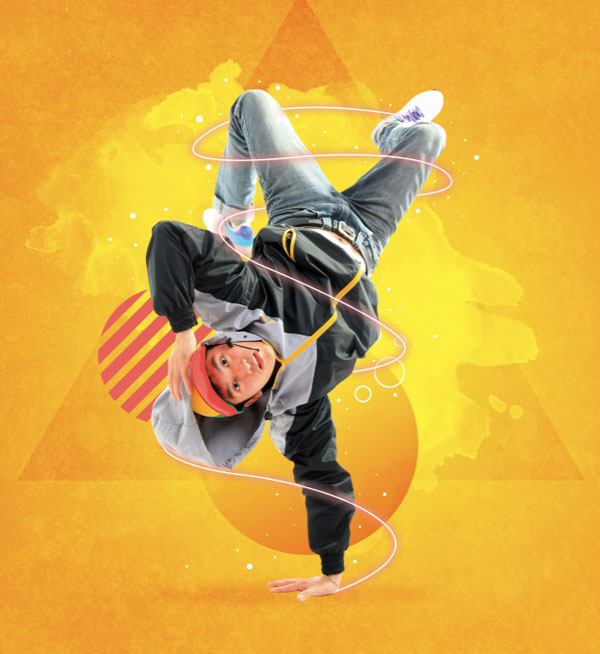
Next, double-click on stars layer to access the Layer Style dialog window and give the layer an Outer Glow. You can leave the color set to the default, as it seems to work well with our background.
Step 16: Create an Ambient Light Effect
Create a new layer below the light streak layer and change your brush to a large, soft, round brush with an Opacity of about 30%. Use the Eyedropper Tool (I) to sample the magenta color from the diagonal stripes we created earlier.Cmd/Ctrl + click on the breakdancer to create a selection around him, and in the new layer, lightly brush around the areas where the light streak is wrapping around.
Continue to do this on all of the remaining areas where the light and the breakdancer overlaps.
Step 17: Boombastic!
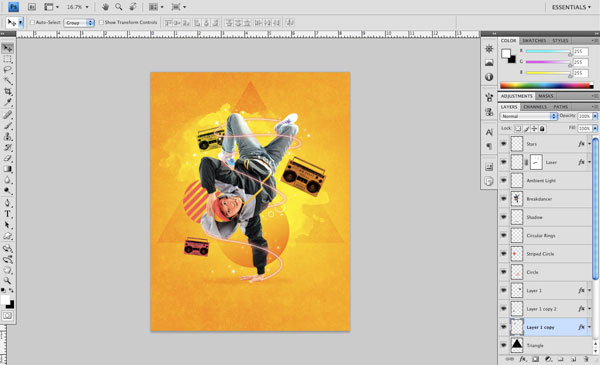
Now we are going to use the boom box that we isolated earlier. Place the boom box into the document above the triangle layer. Use Free Transform (Cmd/Ctrl + T) to scale up and rotate the boom box a bit. Place the boom box behind the breakdancer.Duplicate the boom box twice (Cmd/Ctrl + J), scale down the duplicates, rotate them, and place them at different parts of the scene.
After doing this, double-click on the first boom box layer to access the Layer Style dialog window and give it an orange (#F08E2A) Color Overlay.
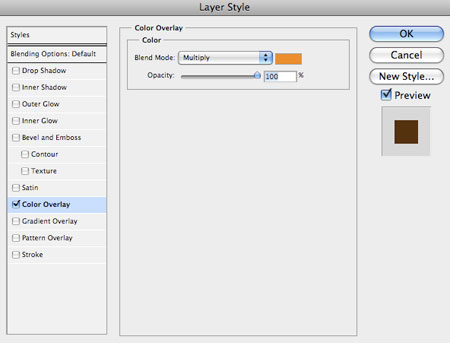
Right-click on the first boom box layer, choose Copy Layer Style from the menu, right-click on a duplicate boom box layer, and choose Paste Layer Style. Change the Color Overlay’s color to a light red (#F26459).
Do the same thing with the other duplicate boom box layer, this time setting the Color Overlay to a bright yellow (#FEDD17).
Step 18: Adding Highlights
Create a new layer at the top of the Layers Panel and select the Gradient Tool (G) set to a Radial Gradient that fades from solid white to transparent. Click and drag outwards to create a small-sized gradient on this new layer. Position the gradient near the intersection of the dancer’s bottom arm and the light streak. Duplicate this gradient a few more times and place it in a few additional key areas.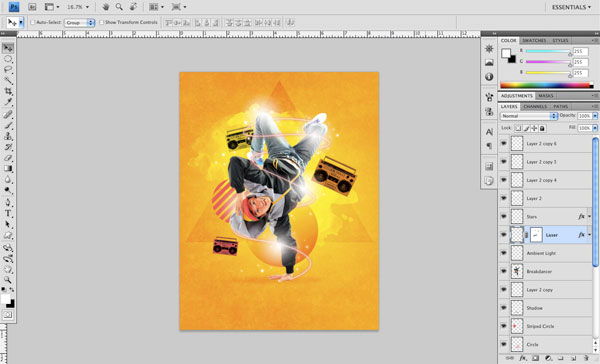
Step 19: Dodge and Burn
Duplicate the breakdancer layer. Select the Burn Tool (O) and set it up to use Midtones and Opacity at 30%. Brush on the areas that are darker to further enhance the shadows and bring out some of the richness in these parts of the scene.Change over to the Dodge Tool and use the same settings to brush on some of the lighter areas to enhance the brightness.
You will notice a few key areas where the Dodge Tool and Burn Tool affect the dancer — particularly the jeans, the jacket, and the face of the breakdancer. Below is a before and after of the scene.
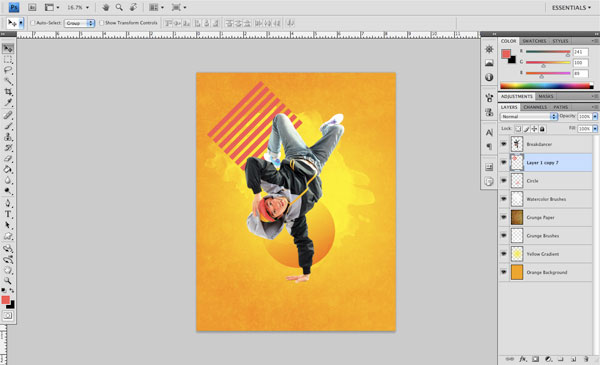
Step 20: Final Tweaks and Adjustments
I want to rotate the diagonal stripe shape that we created earlier on so that the direction of the lines are perpendicular to the left side of the triangle shape.I am just going to slightly darken up the bottom of the image as well. To do this I have selected an orange color sampled from the scene using the Eyedropper Tool (I). Next, I create a new layer and draw out a linear gradient that fades from solid to transparent, starting from the bottom. Lastly, change the Blend Mode of the linear gradient layer to Multiply and lower the opacity as needed.

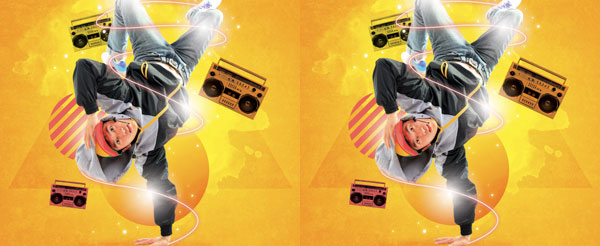
Tutorial Summary
Sit back and take a look at the cool image we just created. In this tutorial, we used Photoshop to compose a dynamic and vibrant, urban-inspired scene. We used various tools such as the Pen Tool, Elliptical Marquee Tool, and Free Transform to create interesting design elements such as light streaks, highlights, and awesome geometric shapes. We also used some custom brushes to create our textured backdrop.I want to take a moment to thank you for following along and I hope that you have enjoyed this design tutorial!
No comments:
Post a Comment