http://cs5tutorial.net/draw-a-classy-3d-poker-chip-in-photoshop/
 Note: If you’re new to Photoshop consider trying out School of Photoshop or some of our other Photoshop Tutorials
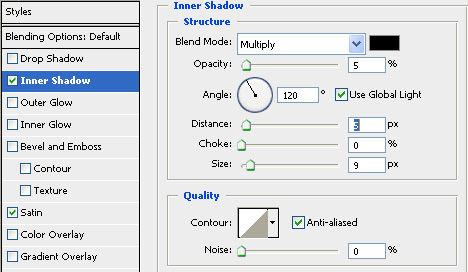
 Then add an Inner Shadow as shown below.
(Ctrl + V), now drag the rectangle center to the circle one and rotate the path of 30° (Ctrl + T), repeat this until you obtain a twelve-pointed star, then fill
the path (Right Mouse > Fill Path …) (set the fill color to white).
 Now use the Elliptical Marquee tool to select the excess and cancel it.

shape
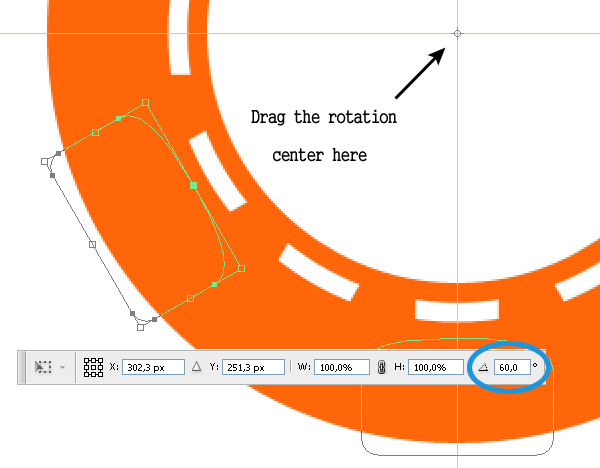
 Copy and past it, then rotate the path of 60° and repeat this until you obtain the desired result.
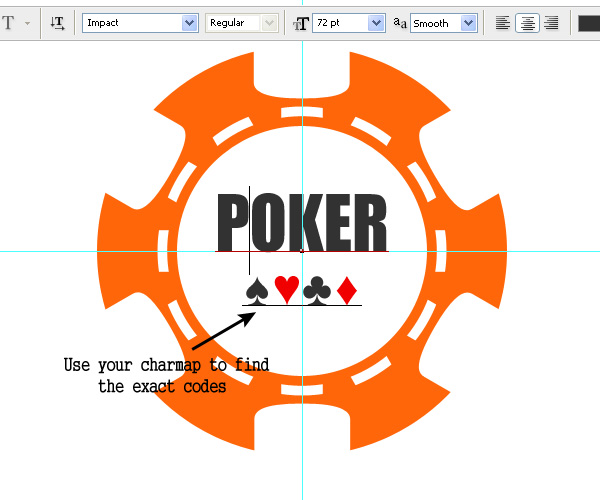
customize it . So choose a font type and using the Text tool add your preferred text. Then using the Free Transform tool rotate it of 60°. I also added two
3px straight line to obtain a better result.
then copy the entire image (Edit > Copy Merged), open a new 600x500px document and paste it.

Now select the path with the Path Selection tool and create a vector mask (Right Click > Create Vector Mask), in this way only what you draw inside the path is
visible. Use the Paint Buket tool to set the correct foreground color, then grab the Rectangle tool and draw the three white shapes as shown below.
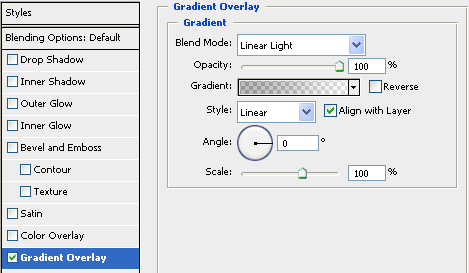
 Finally apply the following layer styles:
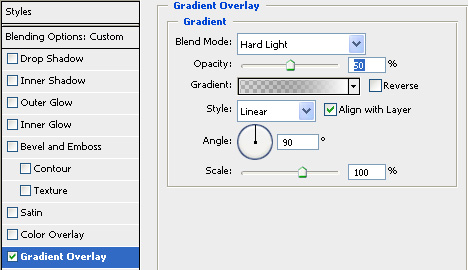
 Then apply these layer styles:
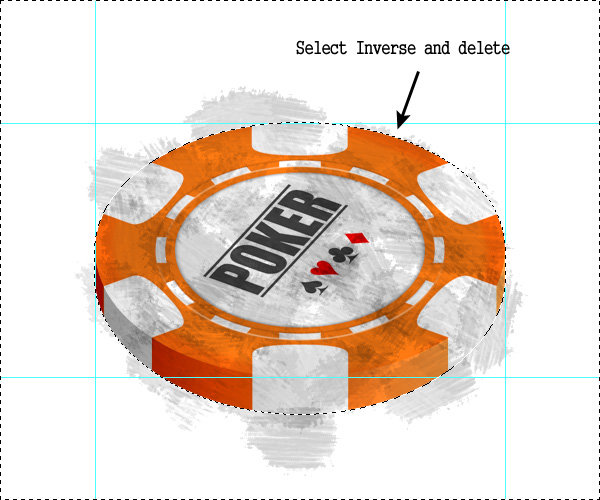
 As usual use the Marquee Tool to delete the outer part
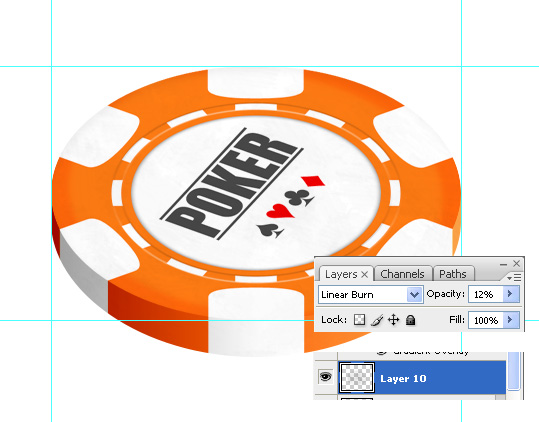
 when you have obtained a good result set the layer blending mode to Linear Burn and the layer opacity to 12%.
 Finally apply these layer styles:

The final result
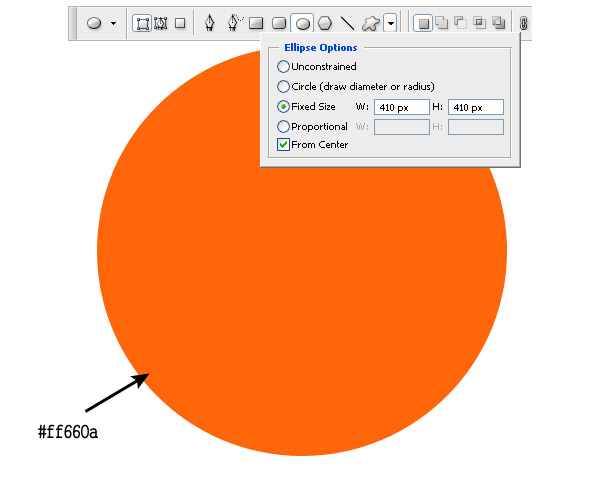
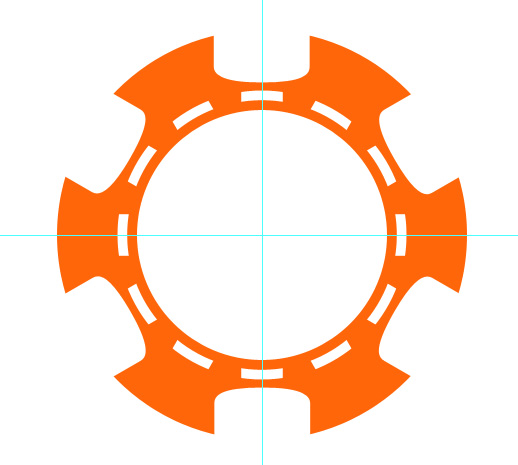
Step 1: Draw a circle
Create a new 600x500px document. Using the Ellipse Shape tool (U) draw a circle. Set the shape color to a bright orange (mine is #ff660a).Use guides!
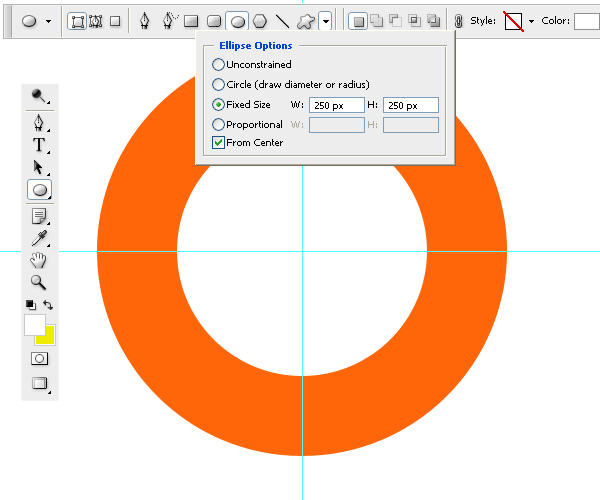
Guides are a useful tool provided by Photoshop. To create a guide go to View > New Guide …Step 2: Draw a second circle
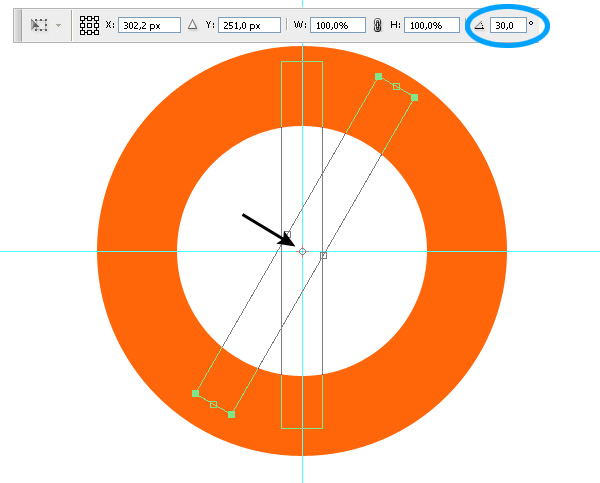
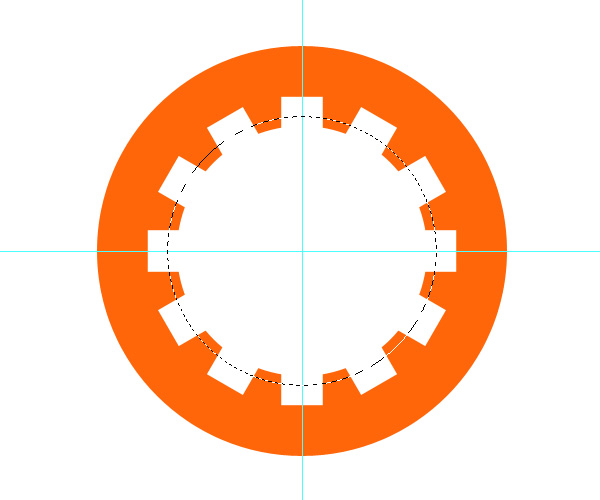
With the same process draw a concentric circle in a new layer and set its color to white.Step 3: Create the dashed ring
Create a new layer. Grab the Rectangle Path tool and create e rectangle path. Select it using the Path Selection tool, copy (Ctrl + C) and paste(Ctrl + V), now drag the rectangle center to the circle one and rotate the path of 30° (Ctrl + T), repeat this until you obtain a twelve-pointed star, then fill
the path (Right Mouse > Fill Path …) (set the fill color to white).
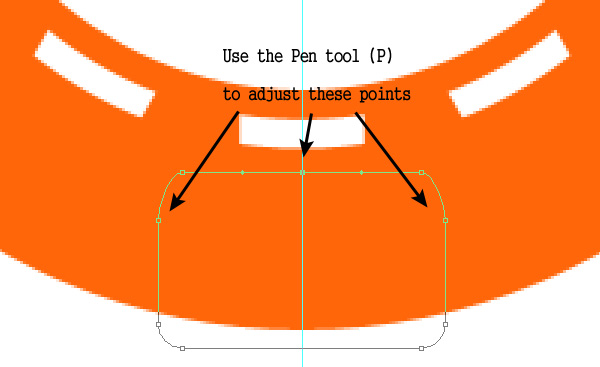
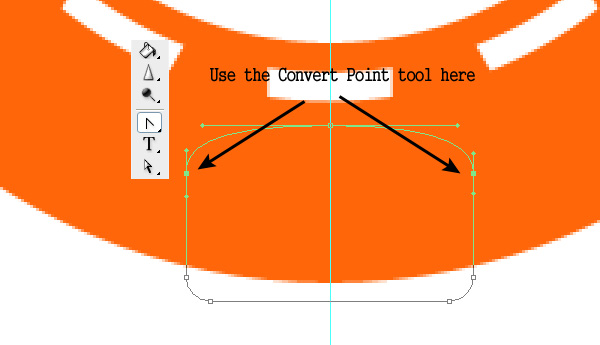
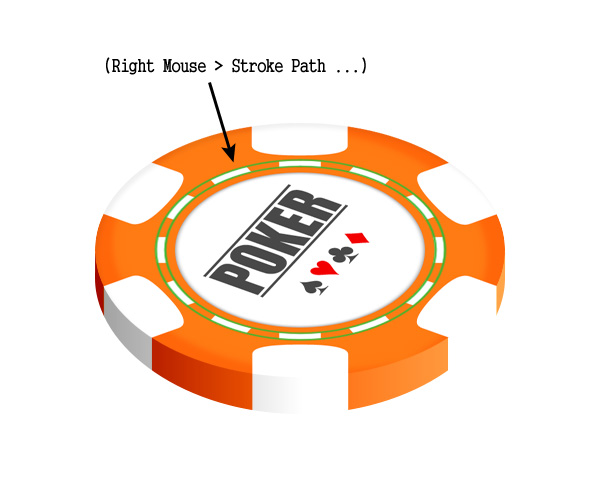
Step 4: Create the outer ring
Now we have to create the outer ring. The method is the same explained previously, using the Rounded Rectangle Shape tool (set the radius to 8px) draw the desiredshape
Step 5: Place the type
To beautify your poker chip put a simple text inside the white circle, I chose to add the word “POKER” but if you live in Las Vegas and own a casino you cancustomize it
3px straight line to obtain a better result.
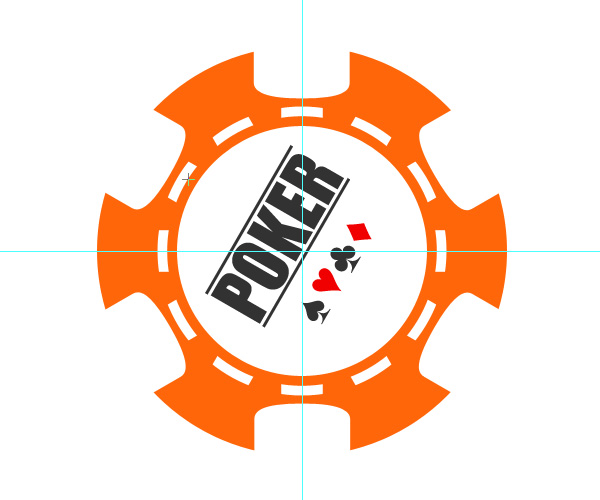
Step 6: Copy
Finally we completed the top of the chip! Now using the Path Selection tool select the great circle path and make selection (Right Click > Make Selection …),then copy the entire image (Edit > Copy Merged), open a new 600x500px document and paste it.
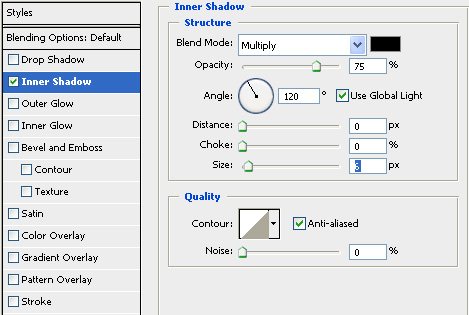
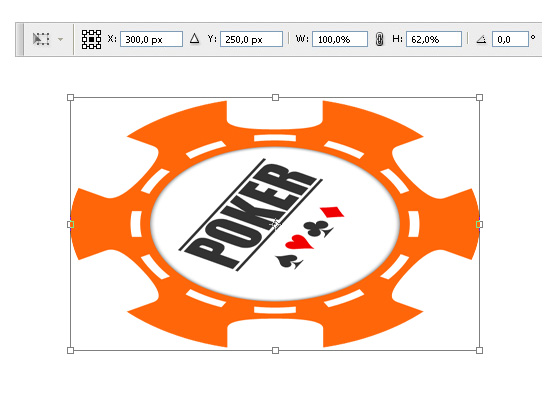
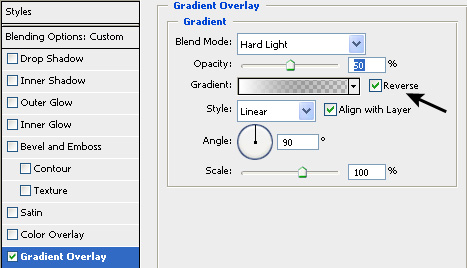
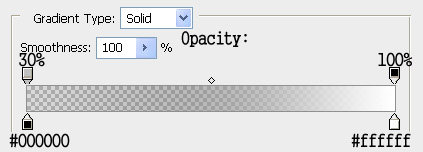
Step 7: Add some effects
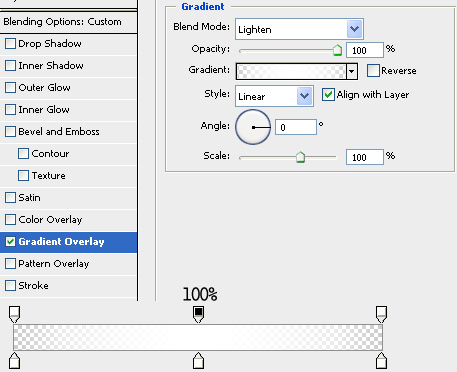
Set the Vertical Scale to 62% (Ctrl + T) and apply the following layer styles:Step 8: Add the third dimension
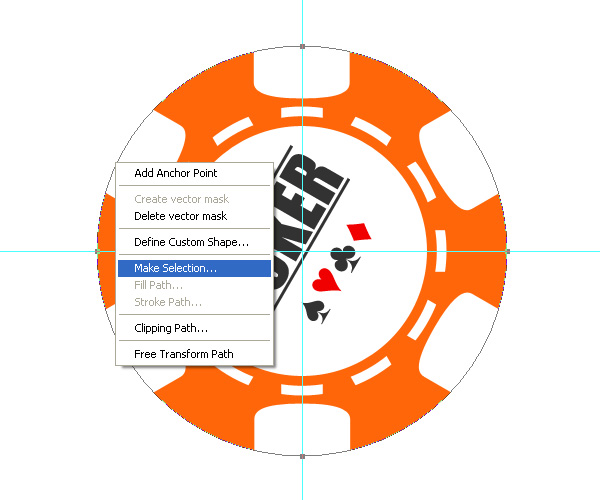
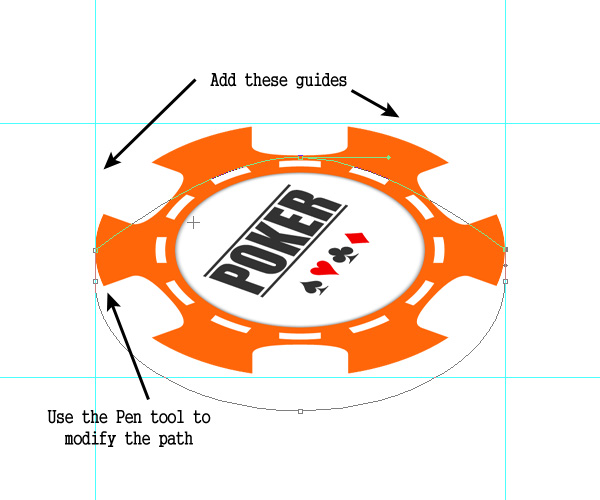
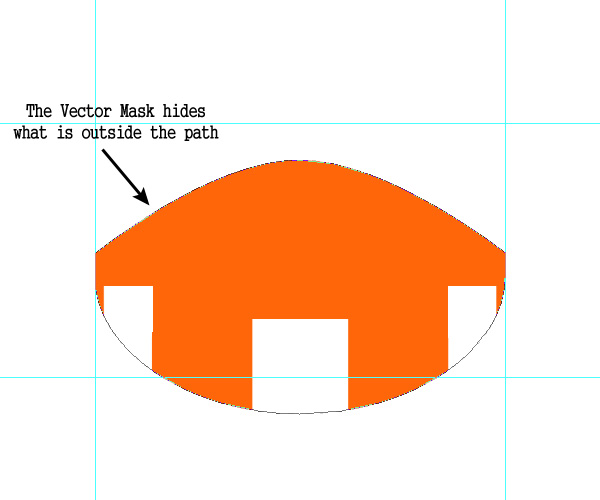
In a new layer using the Ellipse Path tool draw an ellipse. This will be the side of our chip, grab the Pen tool and give the path the correct shape.Now select the path with the Path Selection tool and create a vector mask (Right Click > Create Vector Mask), in this way only what you draw inside the path is
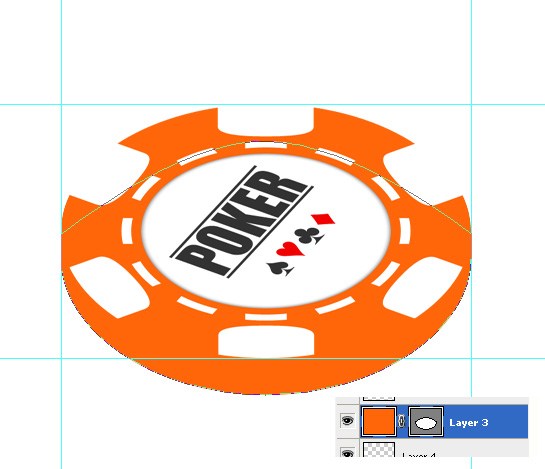
visible. Use the Paint Buket tool to set the correct foreground color, then grab the Rectangle tool and draw the three white shapes as shown below.
Step 9: Create the displacement
Create a new layer and using the Ellipse Path tool draw two ellipses over the dashed ring and set their fill opacity to 0%.Step 10: Add a grunge texture
Create a new layer, grab the Brush tool, select a rough one, set the opacity to 20% and start painting over the imageStep 11: Add the border light
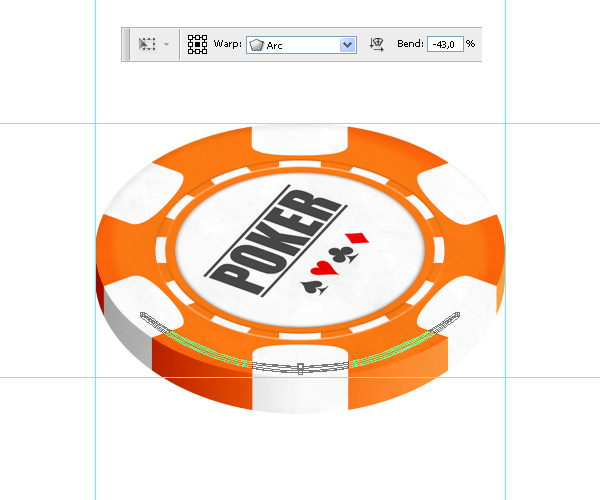
This is the final touch. In a new layer draw an ellipse path, then warp it (Edit > Transform Path > Warp) using the arc mode and set bend to -43.Conclusion
This is the end of our tutorial. Feel free to change the color of the chip as shown below.
No comments:
Post a Comment