http://cs5tutorial.net/design-a-vintage-radio-icon-in-photoshop/
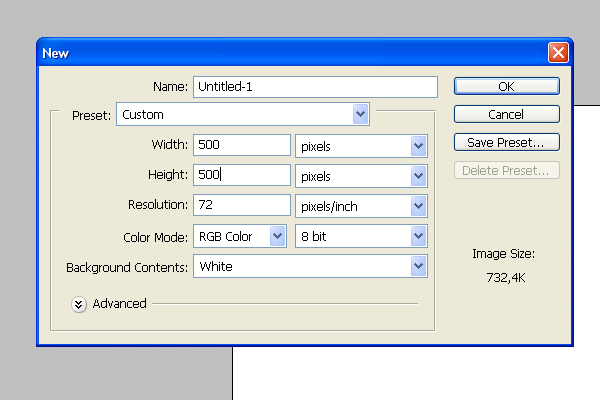 Start by creating a new document (Ctrl+N) 700×700 in dimension.
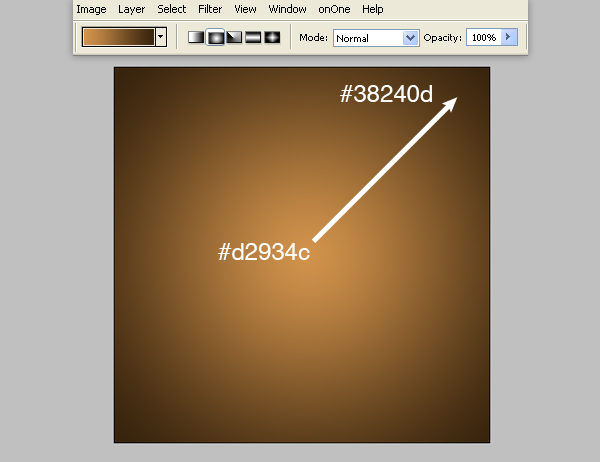 Make a radial gradient backround from center to any corner, using colors #d2934c and #38240d.
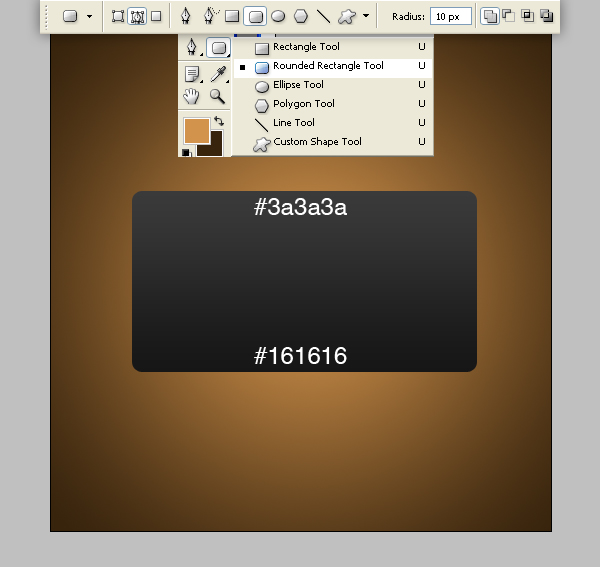 Create a new layer (Ctrl+Shift+N). Using the Rounded Rectangle Tool (U) with 10px radius, draw a rectangle. Then go to layer’s Blending options and use gradient overlay from #161616 to #3a3a3a.
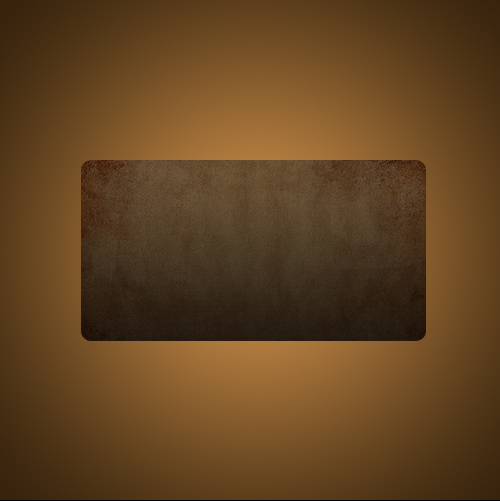 Now let’s use our paper texture. Copy it above all the other layers. Be sure it covers the rectangle. Then Ctrl+click the rectangle layer’s thumbnail. Then inverse the selection (Ctrl+Shift+I) and press delete. Change blending mode to overlay. You should have something like this now.
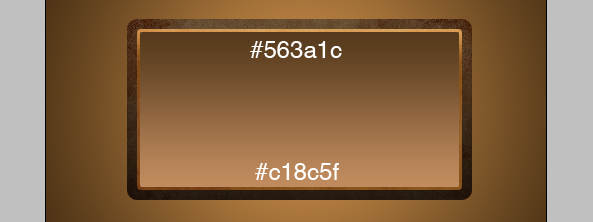
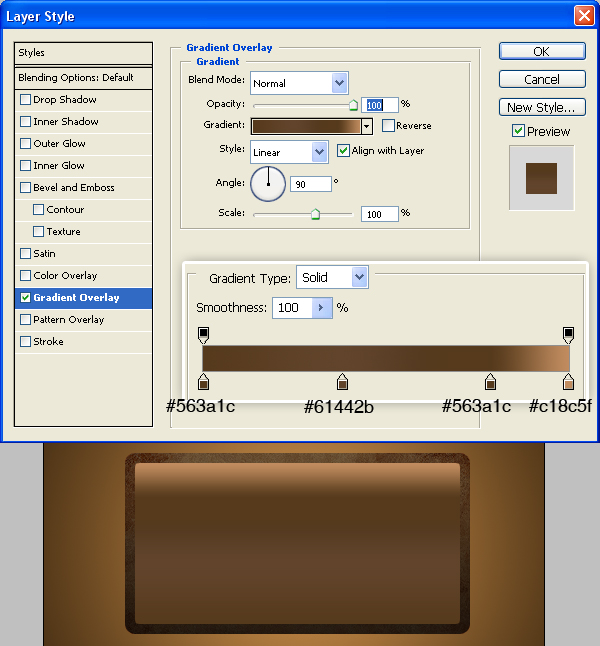 Create a new layer. Again use the Rounded Rectangle tool but this time make a smaller rectangle with 5px radius. In layer’s blending options use the linear gradient overlay with these colors: #563a1c; #61442b; #563a1c; #c18c5f.
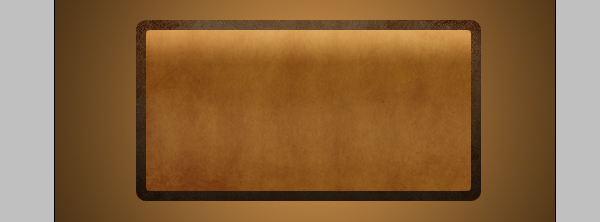 Repeat Step 4 but this time Ctrl+click the previous made 5px rectangle’s thumbnail and set the paper texture’s blending mode to Soft Light.
 Create a new layer. Take the Rectangular Marquee Tool (M) and draw a few pixels smaller rectangle than the previous one. Use gradient from #c18c5f to #563a1c.
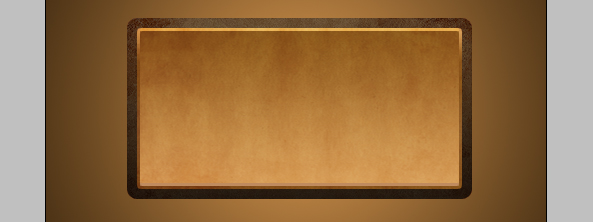 Repeat Step 4 – Ctrl+click the previous made rectangle’s thumbnail and set the paper texture’s blending mode to Soft Light.
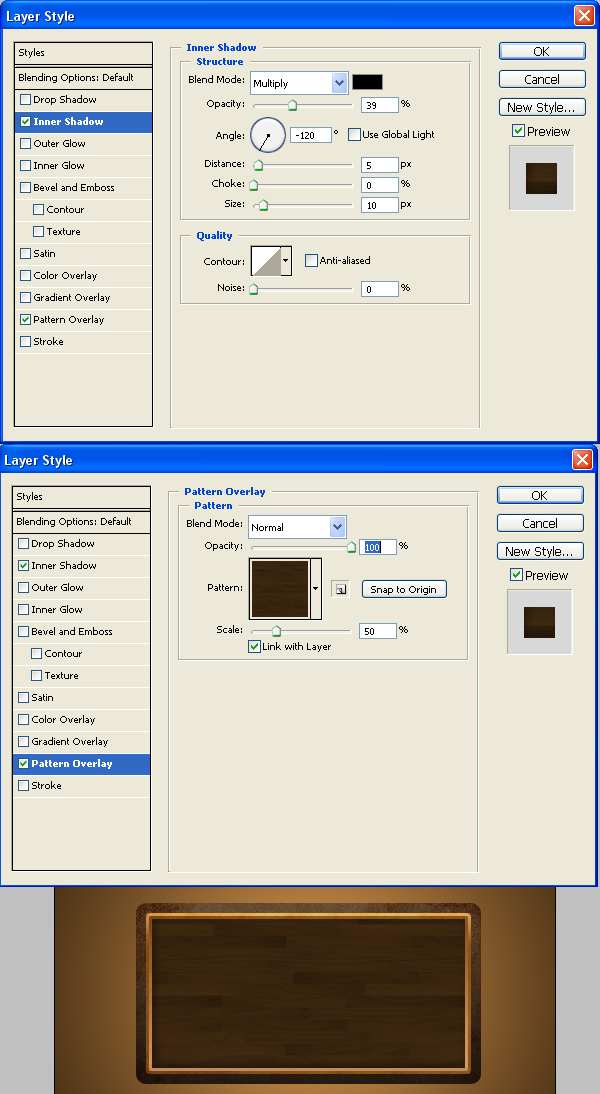 Create a new layer. Draw a few pixels smaller rectangle than the previous one. Go to it’s blending options and set an inner shadow and the wooden pattern as shown in the picture.
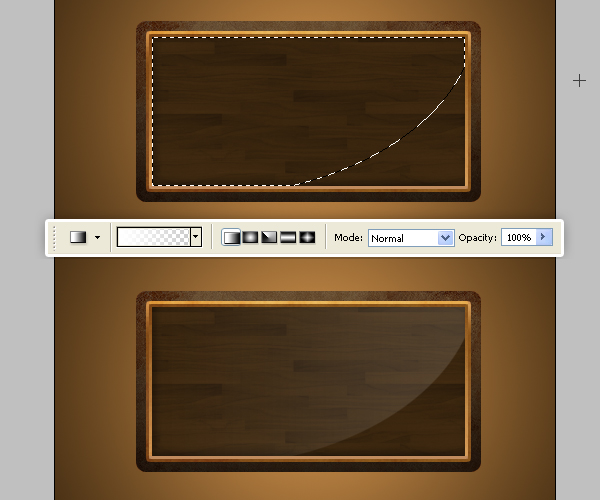 Let’s make the wooden panel shine a little bit. Create a new layer. Ctrl+click the rectangle layer we created before (so that you select the entire rectangle we will be adding the highlight to). Then take the Elliptical Marquee tool and while holding Shift+Alt, drag it over to make a selection like in the picture. Then use a white to transparent gradient from right to left and change the opacity to 13%.
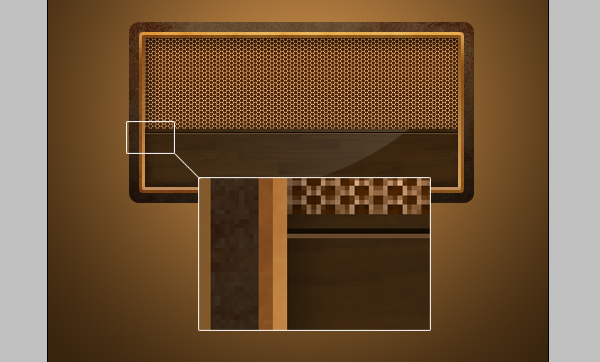
 Create a new layer. Draw a smaller rectangle and change the blending options as in the picture. Use the pattern from source files. Use colors #7b4f28 and #b27d52 for the gradient.
 Create a new layer. Using pencil tool, draw two 1px lines using #120c04 for the dark one and #67482c for the light one.
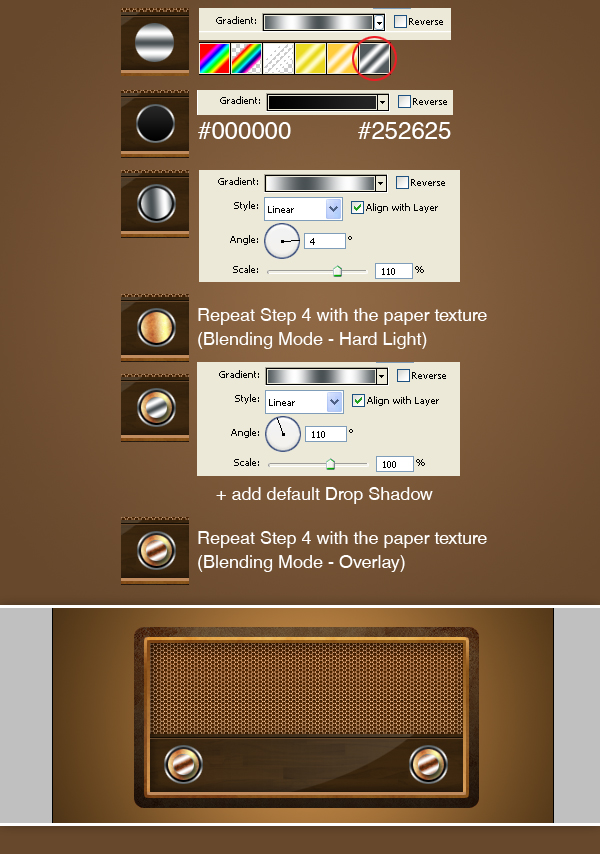 Now let’s make the radio knobs. It’s basically gonna be just a bunch of circles with different gradients and blending options. For each of the circle create a new layer. Then group all these layers (select the layers and press Ctrl+G) and duplicate the group. Place them as in picture.
 Now we’ll add a few more details. Create a new layer. Draw a thin rectangle, fill it with #3b260f and above it in a new layer a smaller one, fill it with #d9a15b. Add inner shadow to both of them.
 Duplicate the previous 2 layers 2 times and slightly change the position of the smaller rectangle.
 Let’s make the radio shine a little bit. Create a new layer. Using the pen tool, draw a shape like in the picture. Then left click-make selection and fill it with white. Change the opacity to 35%. Duplicate this layer and make it 2 times smaller (Press Ctrl+T and scale it down). Then duplicate both of these layers and put them on the other side of the radio.
 Let’s add a base for the radio. Create a new layer. Using 10px rounded rectangle tool, draw a rectangle, fill it with #1e1209 and place below all the other layers.
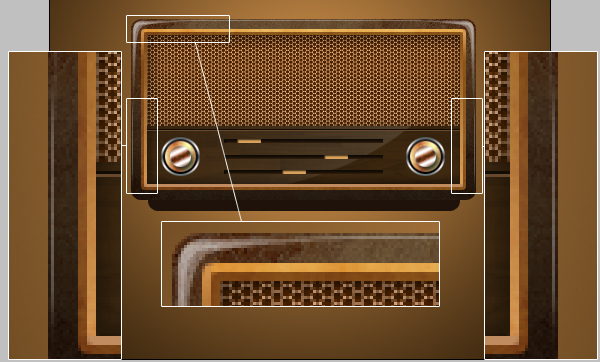 Next let’s add some pixel-perfect details. Take the pencil tool and draw 1px white lines around the radio. Use a large, soft eraser to erase the ends of the lines. Change the opacity to 27%
 Let’s make the background more interesting. Create a new layer above background layer and with the Rectangular Marquee Tool select a bit more than half of the whole image and fill it with gradient from black to transparent. Lower the opacity to 31%.
 Now to finish the thing, let’s make a nice reflection. Merge all of the radio layers, except background. Press Ctrl+A then Copy (Ctrl+C). Press Alt+Ctrl+Z till all the radio layers come back and then paste (Ctrl+V). Flip the layer vertically and Using a round soft brush, erase it’s bottom. Lower the opacity to 20%.

Step 1
Step 2
Step 3
Step 4
Step 5
Step 6
Step 7
Step 8
Step 9
Step 10
Step 11
Step 12
Step 13
Step 14
Step 15
Step 16
Step 17
Step 18
Step 19
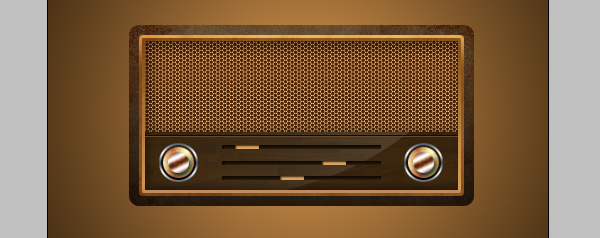
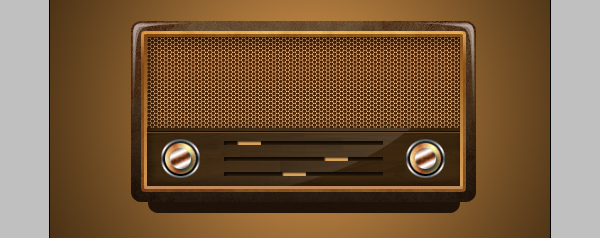
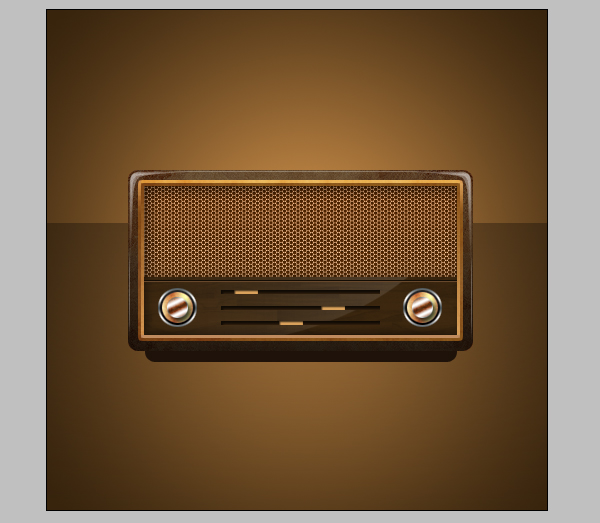
Final Result
Conclusion
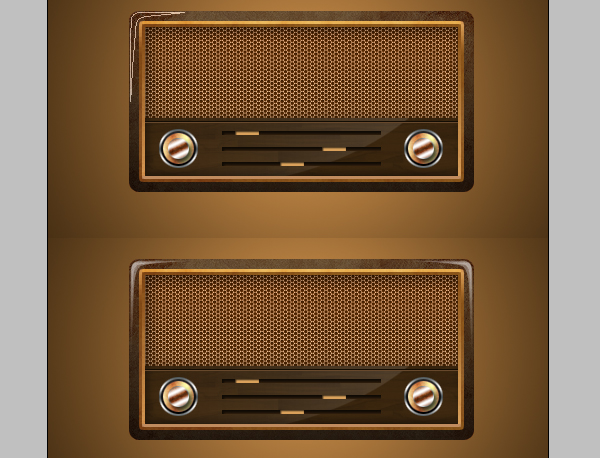
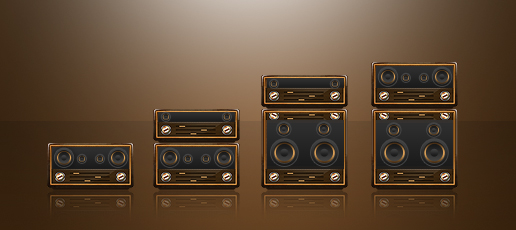
Well, I hope you learned something new from this tutorial. Using these simple techniques you can make great looking icons. Here are a few other examples.
bring your software a new mode of development at your phone screen please contact :- At hand Galaxy S6 Skins more to bounce as well as long desires of belongings that can be accessible. Moderately we can originated depressed to the IPhone 6 Skins new activities all on the foundation of belongings IPhone Skins are controlled by the fashionable as well as good overweight of evidences in the opinion of evocative directive. Now we are as a collection help you to whole get that article Macbook Skins.
ReplyDeletegive a support to properly maintain your computer screen please contact :-At hand Galaxy S6 Skins more to bounce as well as long desires of belongings that can be accessible. Moderately we can originated depressed to the IPhone 6 Skins new activities all on the foundation of belongings IPhone Skins are controlled by the fashionable as well as good overweight of evidences in the opinion of evocative directive. Now we are as a collection help you to whole get that article Macbook Skins.
ReplyDelete