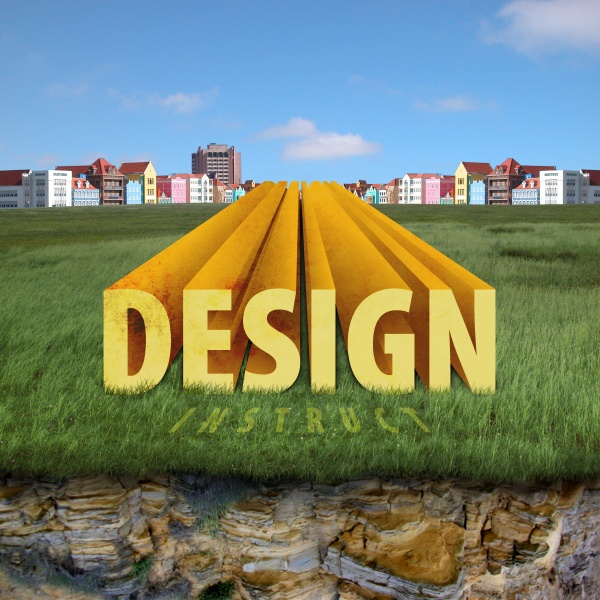
Click on the image to see the final result in full scale.
Tutorial Resources
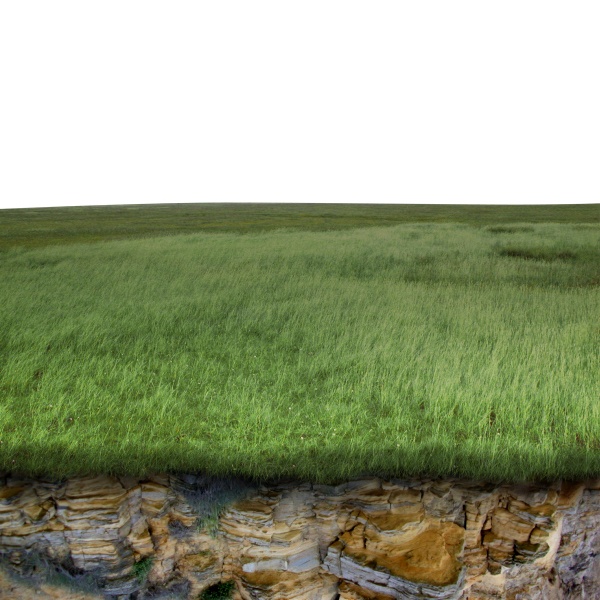
- Stock image: Grass (Image*After)
- Texture: Cliff (Image*After)
- Stock image: Cityscape by Jacco Curacao (Image*After)
- Stock image: Sky (Image*After)
- Texture: Cracked Texture (Unsigned Design)
- Texture: Experimental Texture (Unsigned Design)
- Texture: Film Texture (Unsigned Design)
Step 1: Setting Up in Illustrator
We are going to start by opening up Adobe Illustrator and creating a new 1200×1200px document.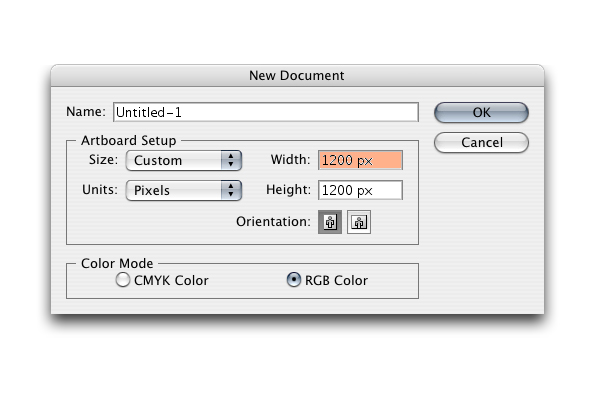
Next, download this Grass stock image and bring it into our Illustrator artboard. We are going to be using this photo simply as a reference for the 3D text we will be producing, so you could lock this layer to prevent us from accidentally moving it around. We will reuse this image in Photoshop, so keep it in a handy location.
Step 2: Create the Front of the 3D Text
Use the Type Tool (T) to write out the word “DESIGN” using Myriad Pro Black Condensed or a similar bold sans-serif font. So that our text block is easier to work with, we are going to go to Type > Create Outlines (Shift + Ctrl/Cmd + O) to convert the text layer to vector paths.
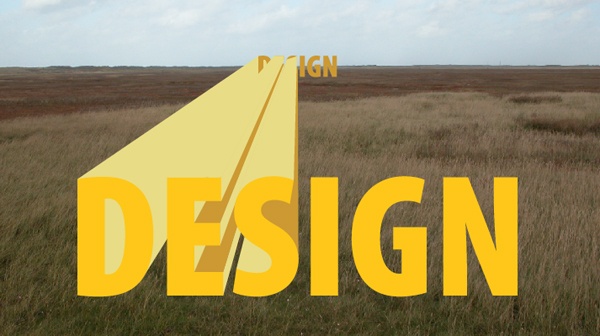
Step 3: Create the Back of the 3D Text
Duplicate the “DESIGN” object–select it with the Selection Tool, press Ctrl/Cmd + C to copy, then press Ctrl/Cmd + F to paste in front. Move the duplicate up to the horizon line of the grass image. Hold down Shift + Alt/Option, then click and drag one of the corners inward to shrink it down, while keeping its position in place.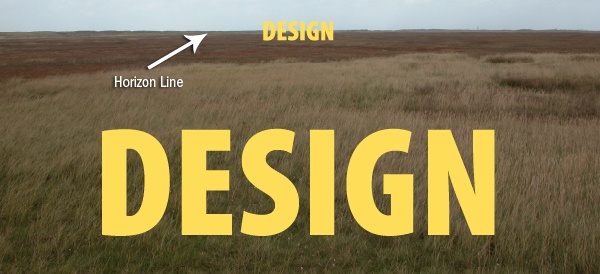
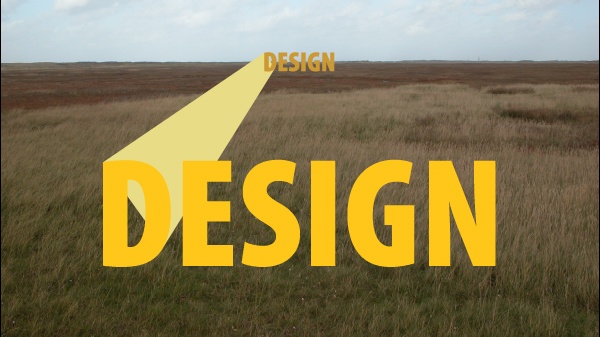
Step 4: Developing the 3D Text
First let’s change the fill color of the text in front to a shade of yellow (#FEC719). Let us also change the fill color of the text in the back to a darker, more muted shade of yellow (#CC9933).Now we are ready to build our 3D text. First, ungroup our two “DESIGN” text objects (select them, and then press Shift + Ctrl/Cmd + G or go to Object > Ungroup).
Let us start with the “D”: Click on the Pen Tool (P) in the Tools Panel, and then create a rectangular shape. Change the color of the rectangular shape to a shade of yellow (#E8DC86).

Use the Direct Selection Tool (A) to drag the corner anchor points so the ones on the left side align with the left corners of the “D” (use View > Smart Guides to have the box snap to the corners of the “D”). Make another rectangular shape that covers the middle part of the “D” as well.
Select all the vector shapes associated with the “D” and go to Object > Group to make our work more manageable and organized.
We are going to go through each of the letters and create rectangular shapes that connect the front letter to its back letter, just like we did with the “D”. To make the process easier, you can change the colors of the sides of the text to visually see them better (then we could just correct the colors later on).
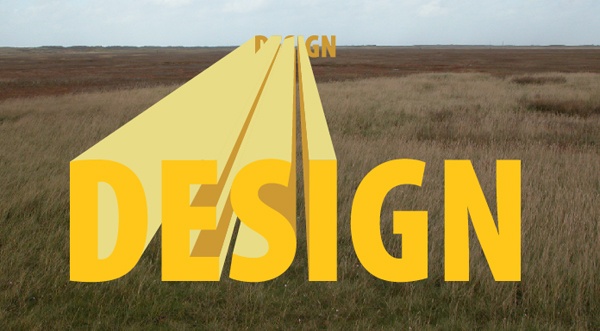
Be sure to group the components of each letter together, just like with the letter “D”, or else our Illustrator document can become unwieldy.
Step 5: Create Gradient Swatches
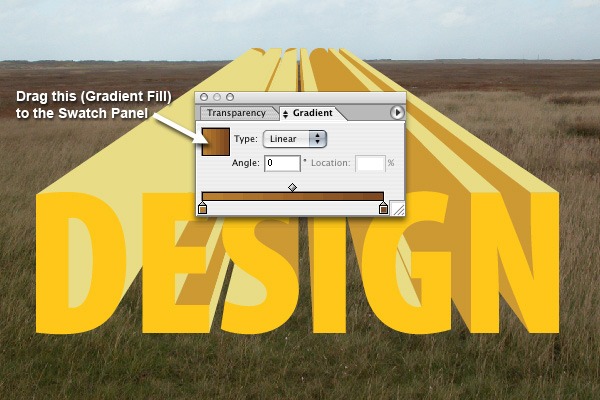
Now that our 3D text is starting to take shape, we can start working on the colors we will be using. To do the shading of our text, we are going to create gradient swatches, which we will later use on subsequent steps. If the Gradient Panel isn’t already open, go to Window > Gradient.Set your Fill color to a shade of yellow (#EDB329), drag it to the left side of our gradient in the Gradient Panel, switch your Fill color to a brown (#7E4920), and, again, drag it to the right side of our gradient. Drag the Gradient Fill we created from the Gradient Panel into the Swatches Panel to add it as a swatch–this will make it easier for us to use this gradient in our work (we merely have to click on it to fill the target objects).
We are also going to create a gradient with brown color (#B97E2E) on the left of the gradient and a darker brown (#7E4920) on the right. Drag this into the Swatches Panel also.
Step 6: Connecting the 3D Text
We want to finish the back end of our text, starting with the “D”. Select the “D” group and then go to Object > Ungroup. Click on the top part of the text and, while holding Shift, click on the back “D” letter to select both of those vector objects. If you don’t already have the Pathfinder Panel open, go to Window > Pathfinder (Shift + Ctrl/Cmd + F9). Alt/Option + click on the Unite Pathfinder icon, and then click on the Expand button.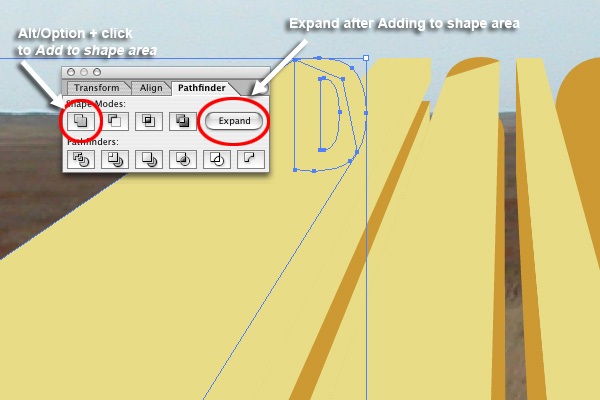
Select the “S”, press Ctrl/Cmd + C to copy, and then press Ctrl/Cmd + F to paste in front so that we end up with two small “S” shapes. Click on one of the “S” shapes and the top part of the “S”, Alt/Option + click on the Unite Pathfinder icon, and then click on the Expand button. This will add the two shapes together and add a little bump on the right side, which we need to get rid of. Click on the shape with the Selection Tool (V) and then switch to the Pen Tool (P). Click on the undesired anchor points to delete them. Take the other “S” shape and the darker bottom shape of the “S”, Alt/Option + click on the Unite Pathfinder icon, and then click on the Expand button.
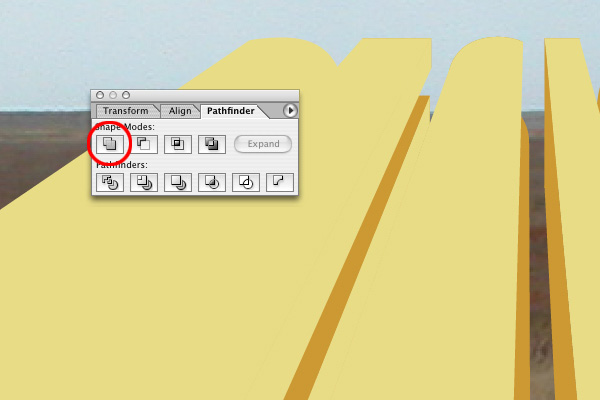
With the “G”, just combine the two visible shapes by clicking on the Unite Pathfinder icon.
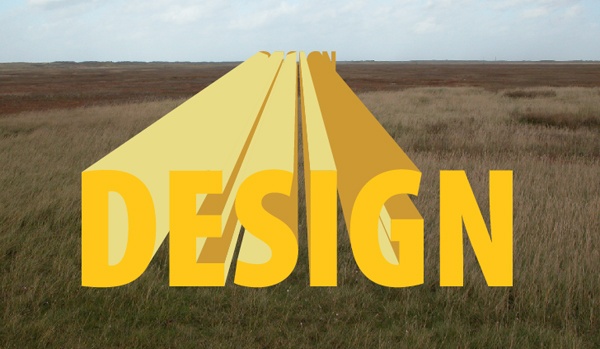
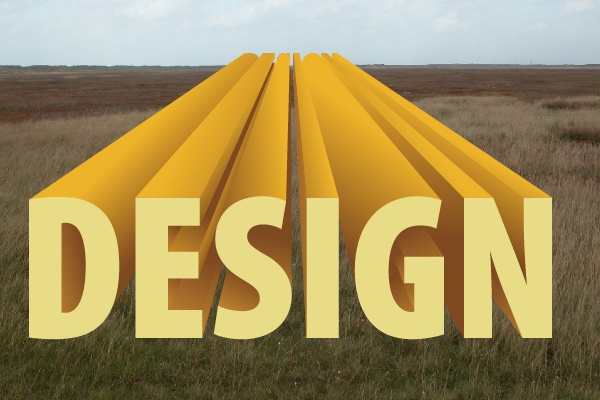
Step 7: Adding Color Gradient
Next, we need to figure out where our light source is coming from so that we have consistent lighting. Let’s decide now that we are going to make the light come from the top of our composition.So, with the light source in mind, we are going to start adding in our gradients by clicking each piece and adding in the light and dark gradients that we saved in our Swatches Panel. You can adjust the gradient with the Gradient Tool (G) in the Tools Panel after you have applied it. Afterwards, change the face of the letters to a muted yellow shade (#E8DC86).
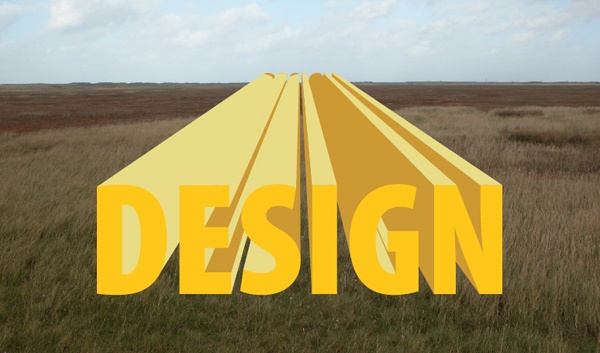
Step 8: Creating the Second Line of Text
Use the Type Tool (T) to write out “INSTRUCT” with the font, Myriad Black Condensed (or your preferred bold, condensed, sans-serif font). Position it below our “DESIGN” text. Go to Type > Create Outlines. Then go to Effect > Warp > Arch and change the Vertical option to 10% to make the text appear as if it is laying on the ground.
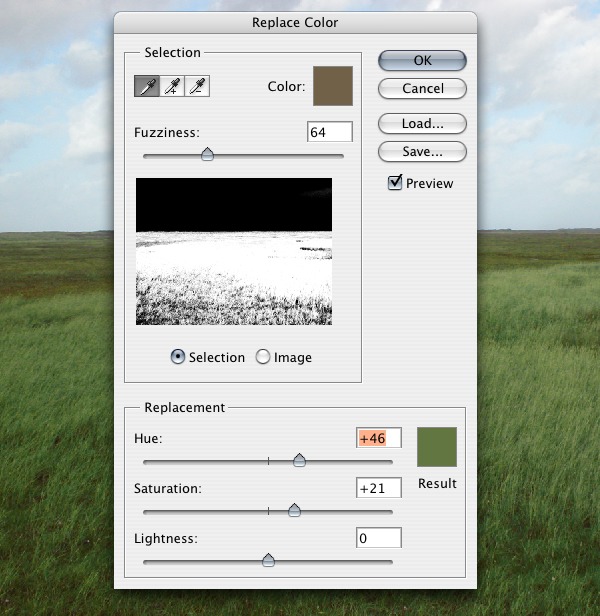
Step 9: Enhancing the Grass in Photoshop
Open the Grass image again, but this time, in Photoshop. We are going to do some color adjustments to the grass so it looks a little greener.Go to Image > Adjustment > Replace Color. Click on the green and brown/tan area (holding Shift and clicking on different areas of the image you want to sample from will add to the selection), and then adjust the hue to a stronger green color.
Step 10: Removing the Sky from the Grass Image
Open up Photoshop and create a new 1200×1200px document. This is the document where we will bring our composition together.First, bring in the grass image that we just enhanced in the previous step, and then use Free Transform (Ctrl/Cmd + T) to resize the image so that it is the same width as the document.
We are going to chop off the sky of the image. To do that, we are going to use the Pen Tool (P) to create a path that surrounds the sky part of the grass image. Go to the Paths Panel (Window > Paths) and Ctrl/Cmd + click on the path we just made to load a selection around the sky. Go back to the Layers Panel, click on the grass layer in the Layers Panel to make it the active layer, and then press Delete to remove the sky.

Step 11: Bring in the 3D Text from Illustrator
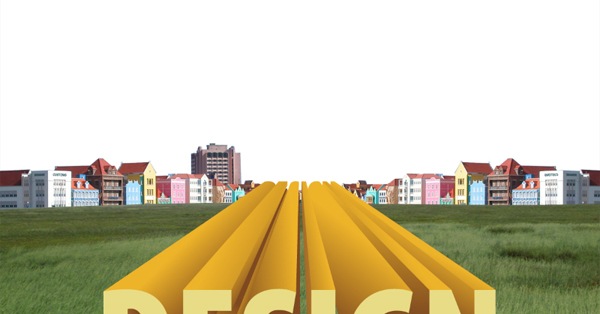
Let’s go back to our Illustrator document and copy our “DESIGN” text, and then switch back to Photoshop and paste it on there. Do the same with our “INSTRUCT” text. Since we used the same document dimensions (and used the grass image as a reference for alignment), pasting it into Photoshop preserves the positions of our text. If this isn’t the case, just use the Move Tool (V) to move the text around so that they are positioned in the canvas properly.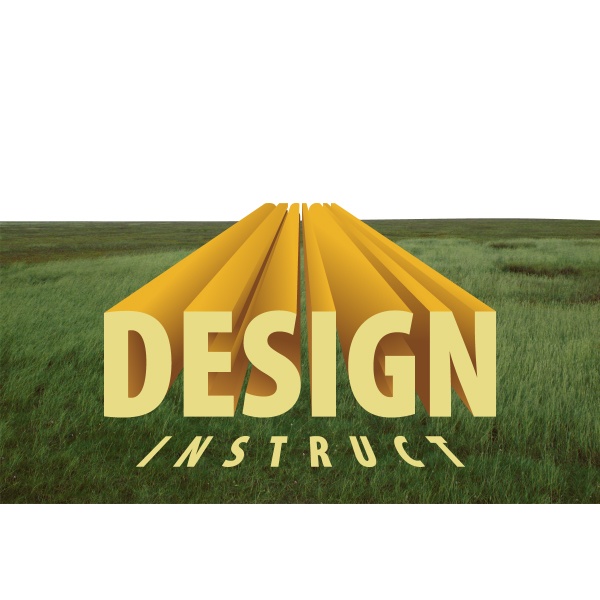
Step 12: Creating the Cliff
Let’s start working on the cliff that will be at the bottom of our composition. Go get the Cliff stock image I listed in the Tutorial Resources section above, and then bring it into our canvas. Rotate it 180o with Free Transform (Ctrl/Cmd + T) and scale it down so that it is the same size as our canvas. Move it behind the grass layer.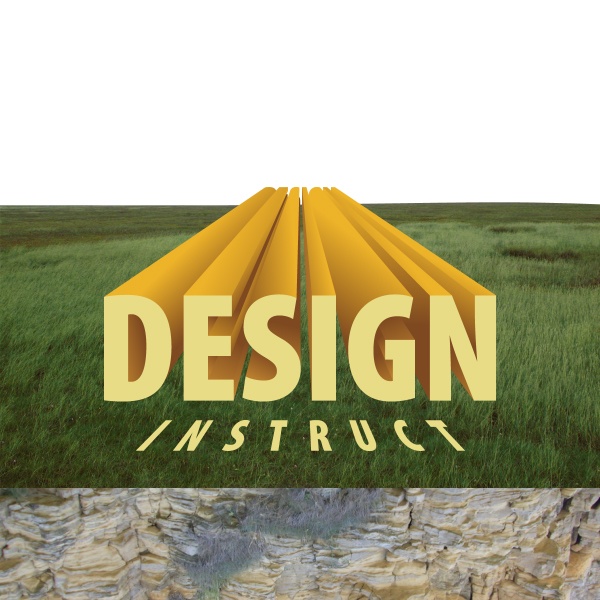
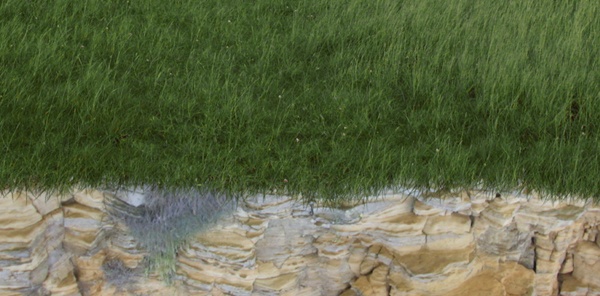
Step 13: Create a Grassy Edge Using a Photoshop Brush
To give the edge where our grass and cliff meets a more organic look, we’ll need to do some retouching. Select the grass layer, then go to Layer > Add Layer Mask > Reveal All. Use the Rectangular Marquee Tool (M) to create a selection around the bottom part of the grass. I toggled off the visibility of my text layers temporarily so that I can focus on this part of the process.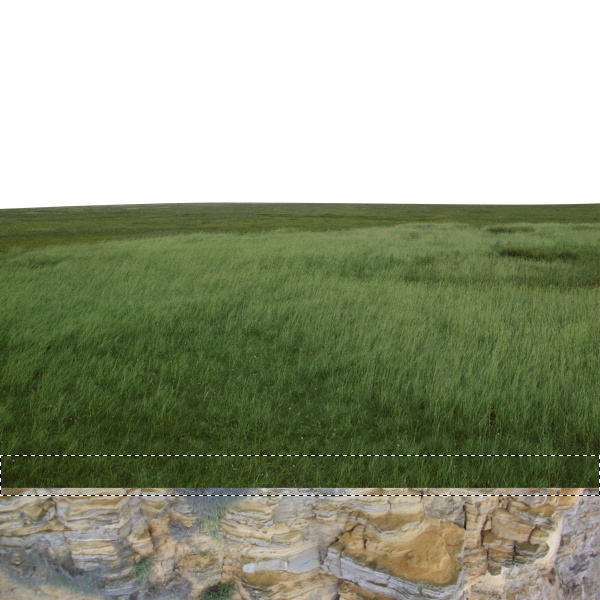
Switch your Foreground Color to black (#000000), then hit Alt/Option + Backspace to fill the selected area with your Foreground Color. This should mask out the selected area (a refresher: When painting on layer masks–black hides, white reveals).
Now we are going to gradually fill back the hidden area using a Photoshop brush. First, switch to the Brush Tool (B). Then go to Window > Brushes (F5) and uncheck the Scattering, Color Dynamics, and Other Dynamics options.
Click on the Brush Tip Shape option, locate the Grass brush tip shape in the preview pane on the right, and change its angle to 180o.
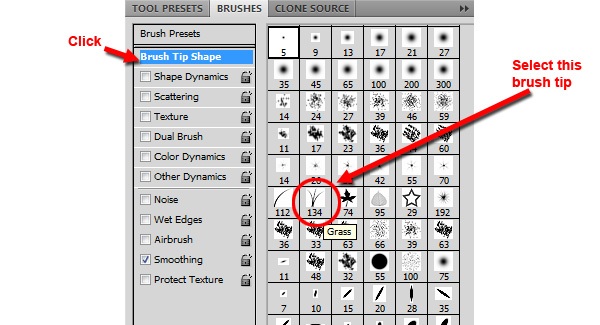
Now we can start using our brush on the area we masked away. Select white (#FFFFFF) as our Foreground Color and drop the size of the brush down to around 60px Master Diameter. Start painting away some of the bottom edge of the grass to create a more natural boundary between the grass and the cliff.
Step 14: Enhancing the Cliff
Click on the cliff layer and go to Image > Adjustment > Levels to open up the Levels dialog window. Bring the left slider in a little bit to bring out more of the blacks and darken the image a little bit.
Let’s add some shadows to the cliff. Pick a brownish greenish color (#1F1C09) for our Foreground Color. We choose this color because the green grass is going to cast a shadow on the brown cliff, so we want to show that in our color selections. Create a layer above the grass and the cliff. Use the Brush Tool (Hardness: 0%, Master Diameter: 20px) to paint on the top surfaces of the cliff. When finished, change the Blend Mode of the layer to Soft Light.
Create a new layer and use a bigger brush tip (Master Diameter: 100px) to paint just below the grass to give these areas a stronger shadow. Change the Blend Mode of the layer to Multiply and lower the Opacity to 50%.
Create another layer below the grass layer, and paint under the grass. Change the Blend Mode of this layer to Multiply.

Step 15: Adding Highlights on the Grass
To give the grassy edge some nice highlighting, we are going to create a new layer and add a white-to-0%-opacity color gradient using the Gradient Tool. To do this, first, change your Foreground Color to white (#FFFFFF). Then switch to the Gradient Tool (G). In the Options Bar, click on the Gradient Editor and then choose the Foreground to Transparent gradient preset. Then create our gradient on the new layer, starting from the bottom of the canvas, and going towards the top.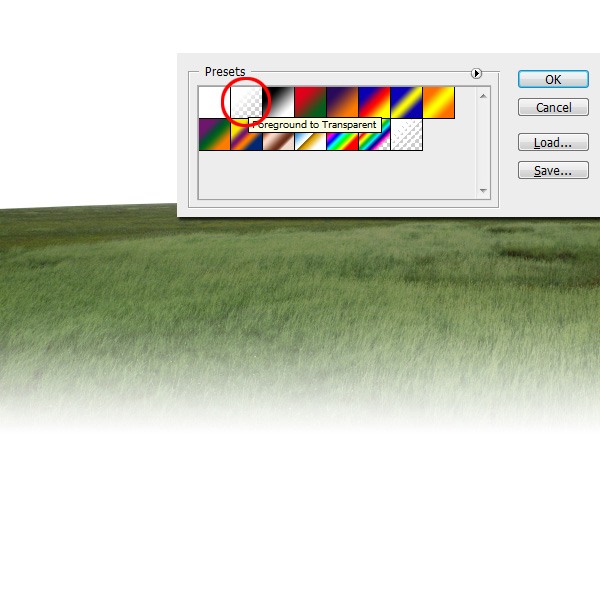
Go to Layer > Layer Mask > Reveal All. Use a black brush–with 0% Hardness and about 125px Master Diameter–to paint away the cliff and some of the bottom portions of the grass.
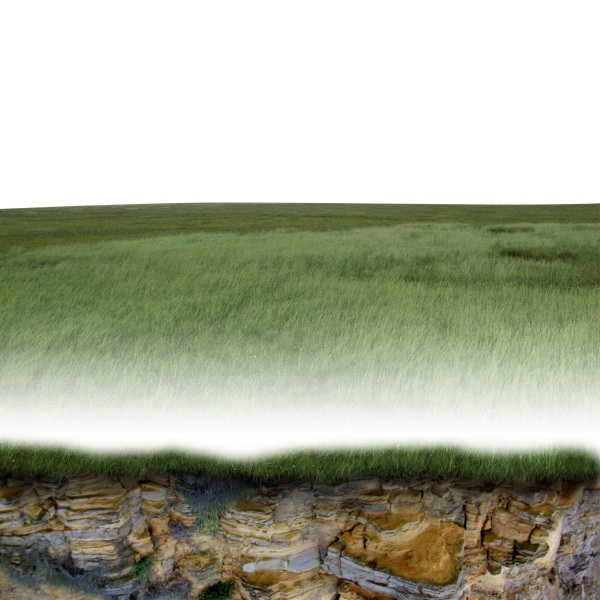
Change the Blend Mode of the layer to Overlay and lower the Opacity to 30%. This will give the grass a highlight as well as a shadow effect on the front of the grass.
Step 16: Adding the Cityscape
Let’s go grab our Cityscape stock image and open it up in Photoshop. Isolate the buildings by using your favorite method (such as using the Pen Tool to draw around them and then copying the selection) and bring them into our canvas. Shrink down the cityscape with Free Transform and locate it on the horizon of the grass with the Move Tool (V). Duplicate the cityscape layer (Layer > Duplicate Layer), then go to Edit > Transform > Flip Horizontally.
Using the Polygonal Lasso Tool (L), take off the big building on the right side of the duplicate to create some variance between the left and right sides of our cityscape.
Step 17: Adding the Sky
Grab this Sky stock image and place it into our canvas. This layer should be behind the cityscape layers.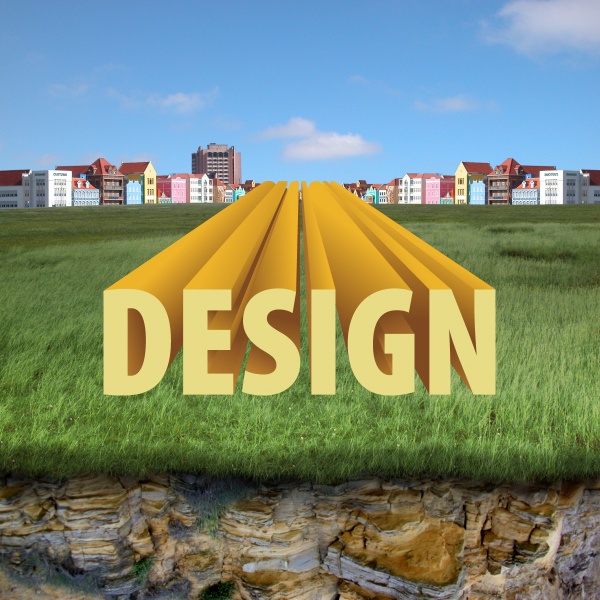
Step 18: Enhancing the Realism of the Grass around the Text
Select the grass layer and the white-to-transparent highlight layer that’s on top of it, then combine them by going to Layer > Merge Layers.To work on the grass in front of the “DESIGN” text block, use the Rectangular Marquee Tool (M) to load a selection around the front of the text block, click on the grass layer in the Layers Panel to make sure it’s the active layer, then go to Layer > Duplicate Layer to place the selected area in a new layer.

Move this layer above the 3D text, then go to Layer > Layer Mask > Hide All.
We need to make the grass blend better with our text. Let’s use our Grass brush again with the same settings as before. Brush away the bottom part of the “DESIGN” text block until you get a satisfactory result.
Step 19: Adding Shadows to the Text
Now we are going to create a drop shadow under the text. Ctrl/Cmd + click on the text layer’s preview thumbnail in the Layers Panel to make a selection around our text. Go to Layer > New > Layer to create a new layer above the text layer and fill the area underneath the selection with black (#000000).Go to Layer > Duplicate Layer so you have two black text layers. Click on the first black layer in the Layers Panel to make it the active layer, go to Filter > Blur > Gaussian Blur (set the Radius to 4px), and run the filter on it.

Run the Gaussian Blur filter again on the second black layer, but this time, set the Radius of the filter to 10px.
We will have some excess shadows that we don’t want, so we’ll use a layer mask to get rid of those. Go to Layer > Add Layer Mask > Reveal All to place a mask on the black text layers, and just start painting away the unwanted portions of the shadows.

Step 20: Adding Textures to the Scene
Time to “grungify” our piece, starting with our 3D text. To kick things off, download the Cracked Texture and the Experimental Texture, then open them in Photoshop.Bring the Experimental texture into our main document and use Free Transform to size it so it fits over our text. Ctrl/Cmd + click on the text layer’s thumbnail in the Layers Panel to load a selection around it. You should still be on the Experimental texture layer (if not, switch back to it). Go to Select > Inverse and delete the selected area. Change the Blend Mode of the Experimental texture layer to Color Burn and lower its Opacity to 50%.
Now bring in the Cracked texture and do the same thing, except change the Blend Mode to Soft Light (instead of Color Burn).

Download this Film Texture and open it in Photoshop. Place it into our main document, making sure that it is covering the entire canvas. Change the Blend Mode of the Film texture layer to Soft Light.
Go to Image > Adjustments > Curves and perform adjustments so as to lighten up the layer a bit so that it’s not too harsh.


Step 21: Adjusting the Scene’s Colors
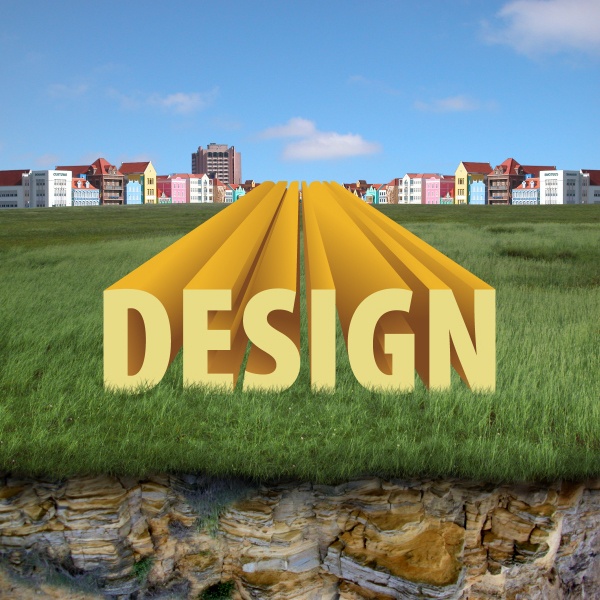
We are going to adjust the color of our scene now, just to try and tie everything together better.First, we will use a Gradient Map adjustment layer; go to Layer > New Adjustment Layer > Gradient Map to add one on top of all the layers. Change the Blend Mode of the Gradient Map layer to Soft Light and reduce the Opacity to 40%.

We’ll add another adjustment layer; Go to Layer > New Adjustment Layer > Hue/Saturation. Change the Saturation option to about -70. This should dramatically change our composition’s colors so that it has this sort of faded, retro/vintage look to it.

Step 22: Softening the Edges of the Canvas
Let’s soften up the edges of the piece a bit so that we draw better attention to our centerpiece. Use the Rectangular Marquee Tool to place a selection around the canvas–but ever so slightly smaller than it–adjust the Feather option to 60px in the Options Bar, go to Select > Inverse (Shift + Ctrl/Cmd + I), and fill the inverted selection with black. Change the Blend Mode to Overlay afterwards.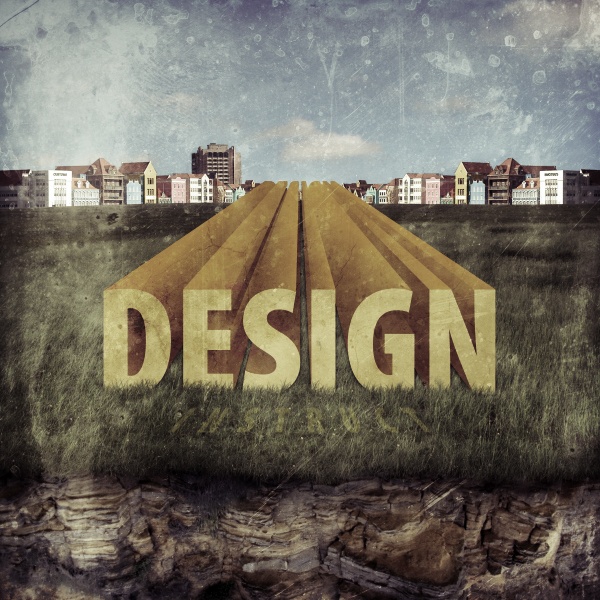
Step 23: Final Adjustments and Enhancements
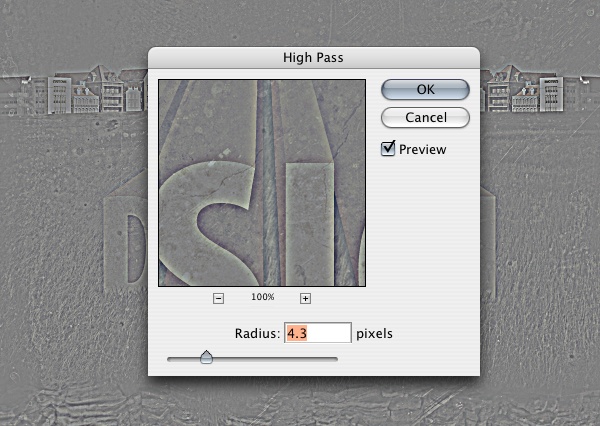
It’s best to save your work before doing this step so that you can go back to your work and modify it later on.Go to Layer > Flatten Image to combine all of our layers into one layer. Go to Layer > Duplicate Layer to duplicate our flattened layer, then Filter > Other > High Pass (set the Radius at about 4.3px before your execute the filter).
Change the Blend Mode of the layer to Soft Light.
Flatten the image again. Use the Elliptical Marquee Tool (M) with Feather at 60px to make a circle in the middle of the canvas that covers the text. Go to Select > Inverse. Then go to Filter > Blur > Gaussian Blur with the Radius set at about 1.8px.
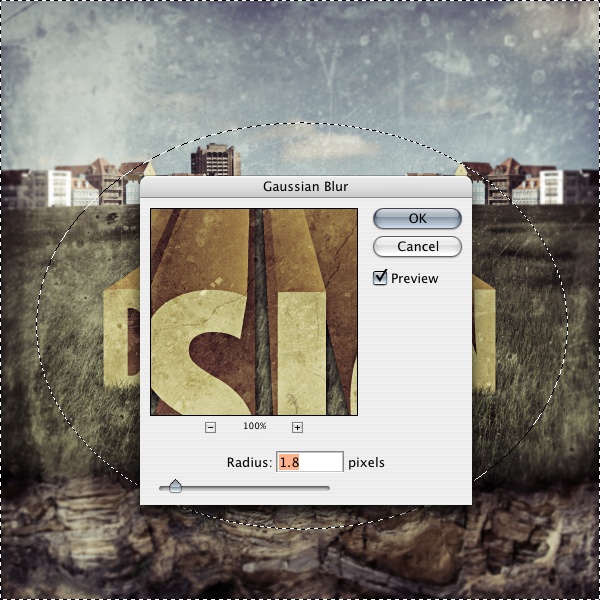
This should slightly blur the areas around the text to give our centerpiece a better focal point as well as enhance our depth of field.
Tutorial Summary
In this tutorial, we used Illustrator to produce some interesting 3D text. We then built our composition in Photoshop using various techniques such as smooth-blending edges using layer masks and a Photoshop brush, applying image adjustments, using adjustment layers to control the scene’s colors, and more.Here is what I came up with; make sure to link to your version in the comments (and add it to our Flickr group)!
No comments:
Post a Comment